
Pilates reformer core exercises combine trunk control with movement against springs on a sliding carriage. The appropriate exercise depends on your experience and equipment setup. Learn the apparatus with a qualified instructor. Our Pilates equipment guide introduces the parts and explains how a reformer differs from small props.
Key takeaways
These points summarize how Pilates reformer core exercises work and what to discuss with your instructor.
- The core includes muscles around the trunk and pelvis, not only the visible abdominal muscles (1).
- Reformer springs can provide resistance or support, depending on the movement (2).
- Beginners need instruction in carriage control, spring selection, and getting on and off the apparatus (2).
- The eight options below are class previews, not independent equipment setup instructions.
- Controlled movement and steady breathing matter more than forcing extra repetitions (3).
- A core-focused class can sit within a broader activity plan covering aerobic work and major muscle groups (4).
What makes reformer exercises a core challenge?
Reformer exercises can require the trunk to remain controlled while the carriage or limbs move. Some exercises also involve deliberate back movement. The task changes with body position, support, and spring direction.
Core training involves coordinated muscles around the abdomen, back, hips, and pelvis (1). An exercise does not need to resemble a crunch to involve that coordination. Leg presses, arm movements, and supported kneeling work can all include a trunk-control task.
A stronger sensation does not prove that one exercise produces better long-term results. Shaking can also mean the current task exceeds your control. Tell the instructor when you cannot return the carriage smoothly.
Judge progress by control and smooth movement. The exercises below focus on movement skills and manageable resistance. They make no promises about changes in appearance.
Read more: Pilates without equipment: a full-body workout at home
What should happen before you start?
A qualified instructor should check the apparatus and teach the setup before you begin. Equipment manuals include model-specific requirements for straps, bars, springs, and supervision (2).
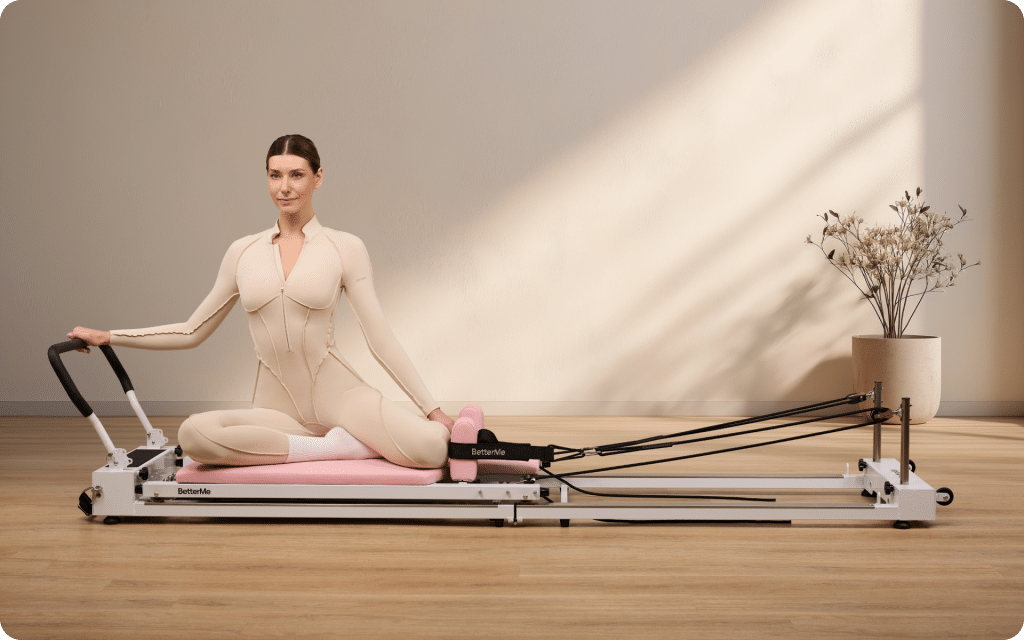
The instructor should establish your starting position and explain how to finish the exercise. Ask where your hands and feet belong during transitions. Keep fingers clear of moving carriage mechanisms.
Do not change springs while trying to hold an unfamiliar position. Pause and follow the instructor’s directions. The lightest setting is not automatically the easiest because reduced support can increase the control demand.
Ask for guidance if a strain, health condition, or recent surgery affects your exercise choices (5). Pregnancy or recent childbirth may also require different positions. A general class cannot replace an individual care plan.
BetterMe can help you add more structure to your daily wellness routine with workouts, meal planning tools, and habit-building features. Explore the app and take a practical step toward a routine that feels more manageable for you.
Which eight exercises can a class include?
These eight examples describe exercises and adaptations to discuss during supervised practice. The first group uses supported positions. Later options require more coordination or equipment handling. The order is not a compulsory progression ladder.
No universal spring counts are provided. Settings vary by manufacturer, exercise, and person. Your instructor should choose the range and repetition count after seeing your movement.
1. Footwork with a steady pelvis
Footwork uses the legs to move the carriage while the trunk remains supported. A basic version places both feet on the footbar. The apparatus manual describes footwork as including pelvic stability and leg alignment (2).
During instruction, the sequence usually involves these actions:
- Settle into the instructor-selected lying position.
- Place your feet where the instructor indicates.
- Press the carriage away through a controlled range.
- Return the carriage without letting it slam.
Your instructor can check whether your pelvis shifts as the legs move. A shorter range may make the return easier to manage. Avoid locking the knees forcefully at the far end.
2. Arm presses with trunk support
Arm presses introduce the straps while the torso remains supported on the carriage. The hands hold the loops; the feet do not belong in the hand loops for this version.
Your instructor chooses whether your legs remain supported or move into a more demanding position. Keeping the head down may help you focus on the arm movement first.
- Hold the loops as demonstrated by your instructor.
- Press your arms toward your sides within the assigned range.
- Return the arms slowly while controlling the carriage.
Avoid pulling so far that your shoulders lift or your ribs flare. Ask for a different setup if strap tension feels difficult to control. The exercise should have a clear start and finish.
3. Hundred preparation
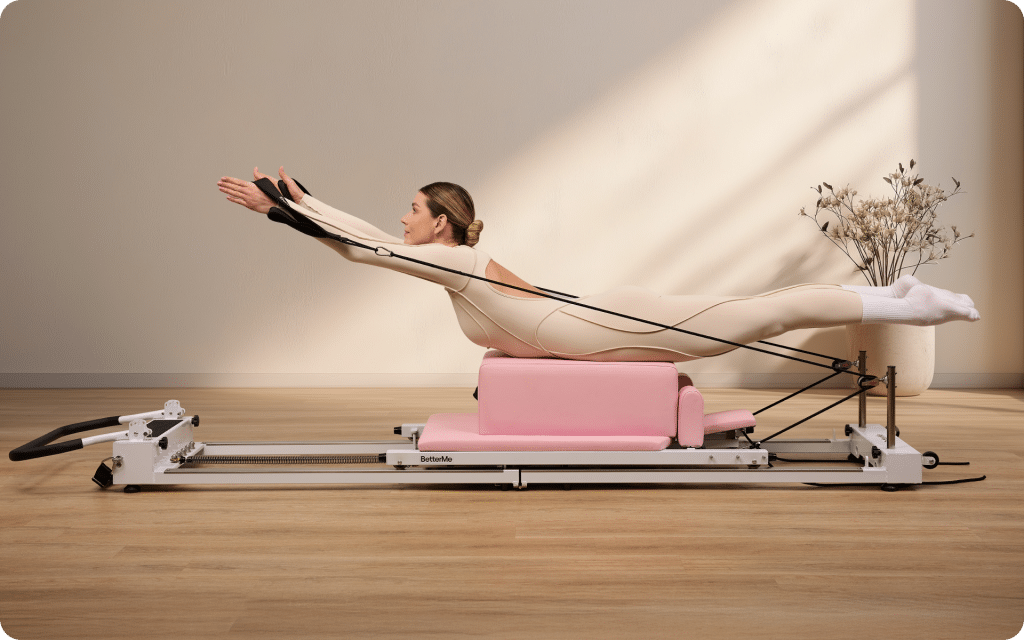
The reformer hundred adds small arm pulses to an abdominal exercise. The full movement can include lifted legs and an upper-body curl. Those additions increase the demands and are not required for a first introduction.
The manufacturer describes hands in loops and graded versions of the exercise (2). An instructor may simplify the position or use a mat preparation before introducing the apparatus version.
- Establish the position chosen by your instructor.
- Reach the arms toward the hips.
- Add small controlled pulses while continuing to breathe.
- Stop the pulses before changing the leg or head position.
You do not need to reach 100 pulses. Neck discomfort, breath-holding, or loss of carriage control means the task needs reassessment. Ask for a supported alternative.
4. Feet-in-straps leg lowers
Leg lowers involve moving both legs through a controlled range while the pelvis remains steady. The loops sit around the feet as instructed for the specific apparatus.
Putting the feet into straps and removing them are skills that require instruction. Do not pull one foot free while the other remains loaded. Follow the instructor’s transition method.
- Wait until the instructor confirms the starting position.
- Lower the legs only through the assigned range.
- Raise the legs with a controlled return.
The appropriate range depends partly on flexibility and trunk control. Lowering farther is not automatically an improvement. Your instructor should reduce the range if your back position changes unexpectedly.
5. Small leg circles in straps
Leg circles add a changing direction to feet-in-straps work. The pelvis should remain controlled while the legs trace a manageable shape. Large circles are unnecessary when learning.
- Begin from the instructor-selected feet-in-straps position.
- Trace a small circle with both legs.
- Return to the starting position without rushing.
- Change direction when instructed.
Ask the instructor to check whether your circles are symmetrical. Use a smaller range if one hip moves noticeably. A comfortable, controlled circle matters more than matching a neighboring student’s range.
6. Kneeling abdominal preparation
Kneeling abdominal work can involve moving the carriage beneath a steady upper body. One documented version uses hands on the frame and knees on the carriage (2).
This position loads the wrists and knees. It also places the body across fixed and moving surfaces. Learn the setup directly from an instructor rather than copying a written description alone.
- Establish the supported kneeling position under supervision.
- Draw the carriage inward through a small movement.
- Return the carriage slowly to the starting position.
Keep the range modest while learning the relationship between hips and carriage. Ask for a lying alternative if kneeling is uncomfortable. Do not substitute a pike or moving plank without instruction.
7. Seated chariot or roll-back preparation
The chariot uses a seated position facing the straps. A supervised version combines a controlled roll-back with spring resistance. The manufacturer lists comfort with rounding the back among the prerequisites (2).
This exercise is not appropriate for everyone. Anyone with restrictions on bending forward may need a different option. Ask your instructor to check those restrictions before introducing the movement.
- Begin seated in the position demonstrated by your instructor.
- Hold the loops with relaxed shoulders.
- Roll backward only through the assigned range.
- Return to the seated position with control.
Avoid collapsing into the straps or pulling yourself upright with a sudden arm movement. A small range can still require concentration. Stop when the movement no longer follows the intended pattern.
8. Short-box abdominal work
Short-box work places a box across the carriage and uses a foot strap. The box, carriage, and strap must be secured for the exercise. The exact setup belongs to the equipment instructions and instructor (2).
A seated variation may involve a small trunk movement while the lower body remains anchored. This is a more involved setup than ordinary floor sitting. Familiarity with a mat roll-up does not establish readiness.
- Wait while the instructor checks the box and foot strap.
- Take the demonstrated seated position.
- Perform only the selected trunk movement and range.
- Return upright before preparing to dismount.
Do not sit at the box edge or test the strap by leaning suddenly. Ask for a supported carriage exercise if the position feels insecure. The instructor should remain attentive during transitions.
Read more: Home Pilates workout: 9 no-equipment moves for your core
How can an instructor adjust the challenge?
An instructor can change support, range, position, or resistance to make the task more manageable. A spring adjustment is only one option.
|
Difficulty you notice |
Adjustment to discuss |
What to observe afterward |
|---|---|---|
|
Neck strain during a curl |
Head-supported variation |
More comfortable head and shoulder position |
|
Carriage returns abruptly |
Different range or spring setup |
A controlled return |
|
Pelvis shifts during leg movement |
Smaller leg range |
A steadier starting position |
|
Kneeling feels uncomfortable |
Lying or seated alternative |
Comfortable contact and access |
These are discussion prompts, not diagnoses. Sharp discomfort requires stopping and appropriate assessment (5). Do not keep repeating an uncomfortable movement while testing different spring settings yourself.
How often should you practice?
Frequency can reflect the intensity of your sessions, rest, and other training. A core-focused class is one part of an exercise week. Adults generally need strengthening on at least 2 days and regular aerobic activity (4).
For an introductory class, ask your instructor how to space sessions while learning. Avoid training the same muscles hard on consecutive days (3). More apparatus time is not automatically more useful when fatigue affects control.
Keep suitable walking or another aerobic activity alongside reformer practice. Gentle instruction time should not automatically count as moderate exercise. Moderate effort typically permits talking but makes singing difficult (6).
Our mat Pilates vs reformer Pilates comparison can help you combine formats. For simpler prop work, consider Pilates ball exercises using supported floor positions.
Frequently Asked Questions
Are planks, pikes, and teasers beginner exercises?
Those movements can demand substantial control and apparatus experience. Do not use their popularity as a readiness test. Ask your instructor about prerequisites and an appropriate preparation.
How can you track progress with reformer core work?
Track progress with controllable measures, such as a smoother return or consistent range, to discuss progress. Appearance is not a complete measure of strength.
Alt text: Two photographs of a woman checking a wrist device around an exercise session.
Is 20 minutes every day necessary?
A daily 20-minute schedule is not required by this guide. Session content and rest matter more than a fixed duration. Plan frequency with your instructor and account for other demanding exercise.
Does a lighter spring protect your back?
A lighter spring does not establish that an exercise suits your back. Spring force can assist or resist movement (2). Follow individual movement advice and the instructor’s setup.
The bottom line
Learn reformer core work through supported positions and clear instruction. Ask how each setup controls the carriage and how to finish the movement. Progress when your instructor can see consistent technique, rather than chasing a harder-looking exercise.
DISCLAIMER:
This article is intended for general informational purposes only and does not serve to address individual circumstances. It is not a substitute for professional advice or help and should not be relied on for making any kind of decision-making. Any action taken as a direct or indirect result of the information in this article is entirely at your own risk and is your sole responsibility.
BetterMe, its content staff, and its medical advisors accept no responsibility for inaccuracies, errors, misstatements, inconsistencies, or omissions and specifically disclaim any liability, loss or risk, personal, professional or otherwise, which may be incurred as a consequence, directly or indirectly, of the use and/or application of any content.
You should always seek the advice of your physician or other qualified health provider with any questions you may have regarding a medical condition or your specific situation. Never disregard professional medical advice or delay seeking it because of BetterMe content. If you suspect or think you may have a medical emergency, call your doctor.
SOURCES:
- Core exercises: Why you should strengthen your core muscles (2025, mayoclinic.org).
- The Balanced Body Studio Reformer with Tower (2024, s3.amazonaws.com).
- Weight training: Do’s and don’ts of proper technique (2025, mayoclinic.org).
- Adult Activity: An Overview (2023, cdc.gov).
- Pilates video for beginners (2025, nhs.uk).
- How to Measure Physical Activity Intensity (2025, cdc.gov).
 Reviewed by

 Reviewed by


 By