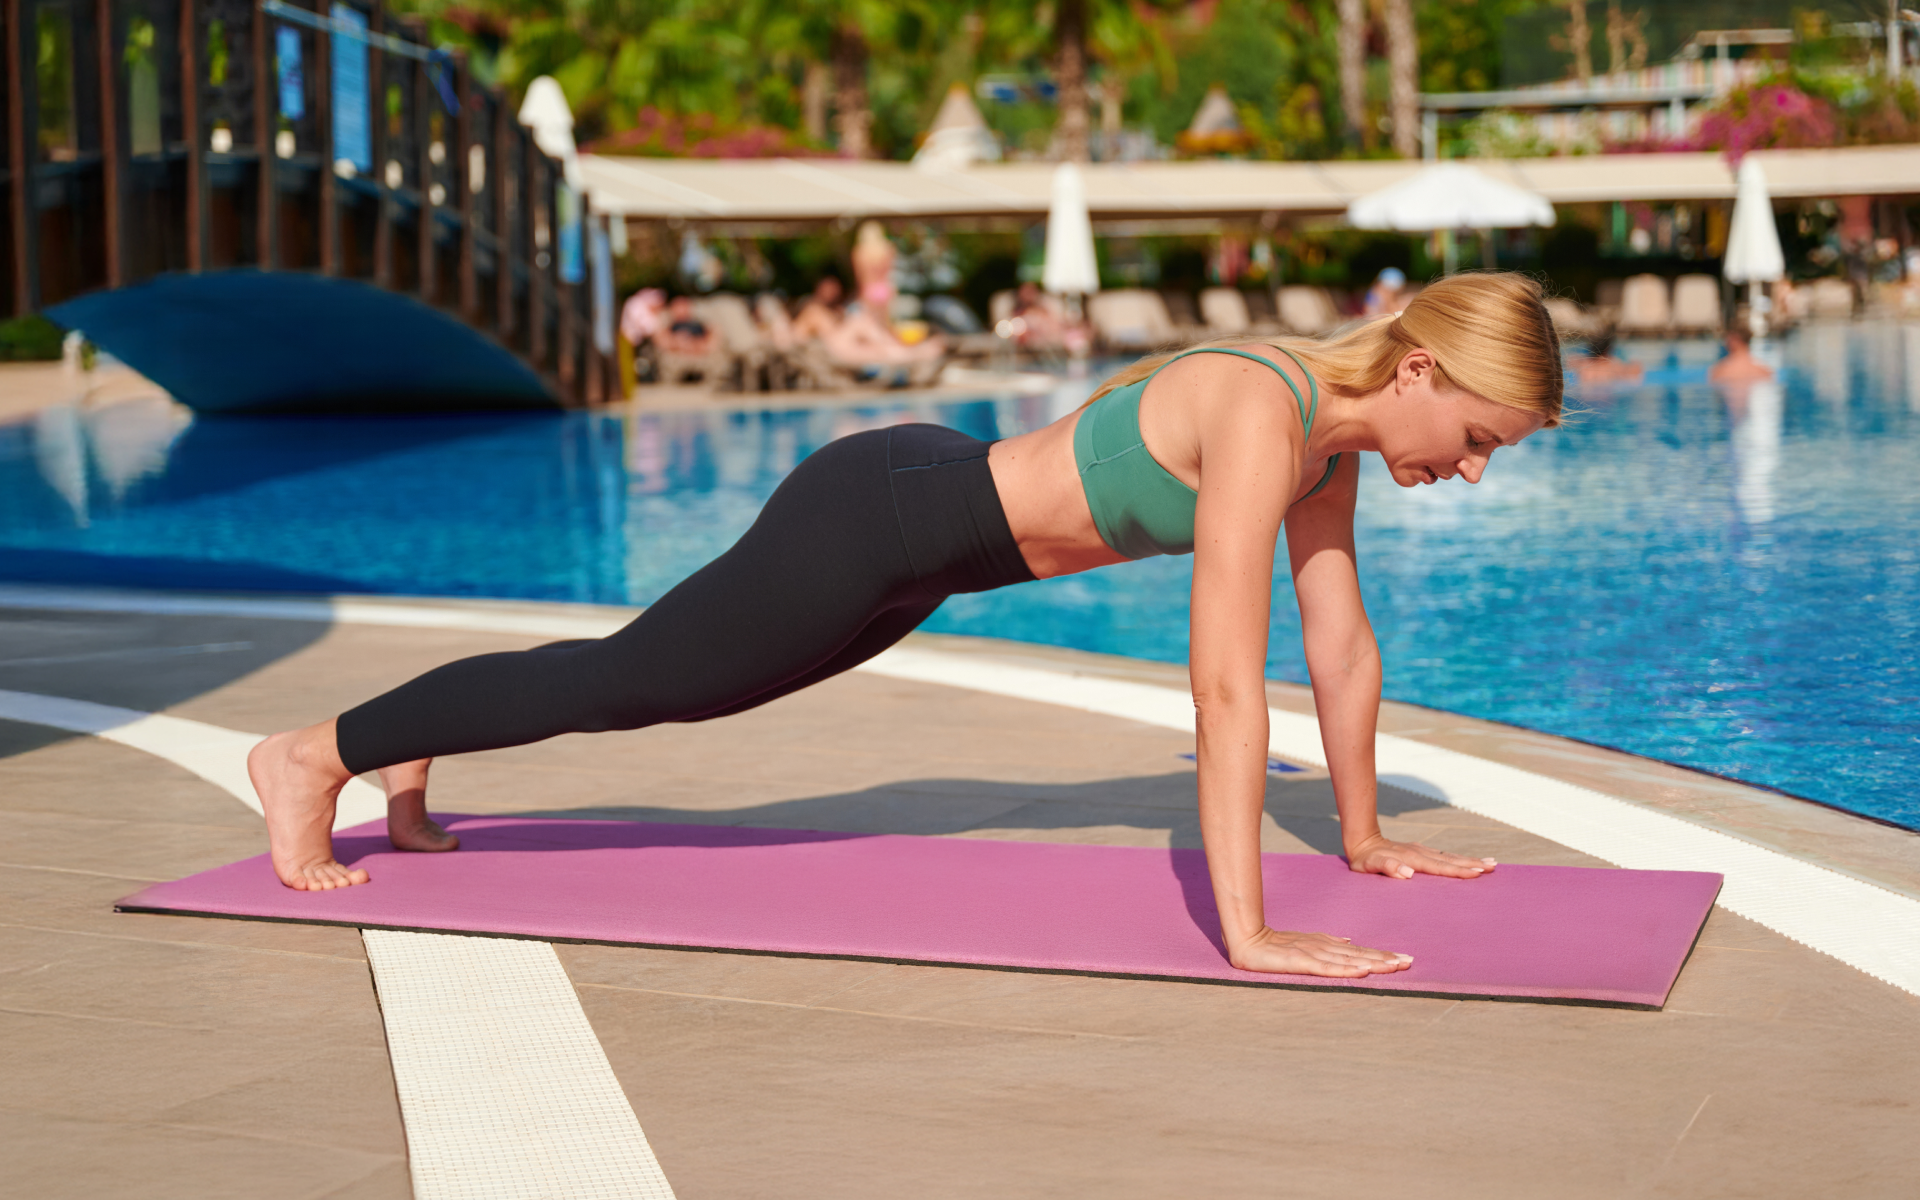
Push-ups are one of the most well-known calisthenic exercises in the world. They’re accessible and adaptable to just about any fitness level. Although they’re typically thought of as a chest and tricep exercise, they provide an excellent core stability challenge, in addition to notable recruitment of the anterior deltoids.
Arguably the best thing about push-ups is their lack of equipment. As long as you have a stable surface with enough room for your body, you can perform this exercise anytime. However, upper-body pushing exercises go far beyond the standard push-up. There are numerous equipment-free pushing exercises for any fitness level that can be used to make impressive gains for your shoulders, chest, triceps, and core.
The exercises outlined in this article range in level of difficulty, but can all be progressed and regressed based on where you are in your fitness journey. Let’s get started!
Is a Push/Pull Split Good for Calisthenics?
A “push/pull split” refers to the exercises you use for each workout in your training week. While there are many ways to split up your workout program, one of the most popular and most effective splits is the push/pull.
As the name implies, this split alternates “push” days with “pull” days. In other words, let’s say your goal is to work out four days per week. Many people who are struggling with performing four full-body workouts each week do so because they may find their muscles don’t have adequate time to recover. A good solution is to alternate a workout where you perform all the pushing exercises one day, with one where you perform all the pulling exercises. In this four-day workout scenario, the person may choose to perform a push day on Monday, a pull day on Tuesday, a rest day on Wednesday, a push day on Thursday, and a pull day on Friday, before taking the weekend off.
Some even go one step further and separate lower-body workouts from their upper-body workouts. This is referred to as a “push/pull/legs split”. This means the person will perform all upper-body pulling exercises one day, all upper-body pushing exercises the next, and all lower-body exercises on the third day.
Here’s an example of a push/pull/legs split:
Monday: Push
Tuesday: Pull
Wednesday: Legs
Thursday: Rest
Friday: Push
Saturday: Pull
Sunday: Rest
Notice that in the previous example, the individual performs two push and two pull workouts, but only one lower-body workout. This is common as lower-body workouts typically result in significantly more metabolic stress than upper-body workouts, so they require more recovery time and less frequency for muscle adaptation.
The primary benefits of using a push/pull split are:
- Higher training frequency. As you’ll have a minimum of one day off between training sessions in which you work the same muscle groups, you’re able to complete a higher frequency of training while still meeting rest recommendations.
- Time efficiency. As you’ll be increasing your training frequency, you can decrease your training volume in every workout and still achieve the same weekly volume as you would with fewer but longer full-body workouts.
- Strength and muscle gains. Some research has suggested that higher weekly training frequencies using a push/pull split of the major muscle groups results in improved strength and muscle gains, while other research found there to be no meaningful difference, assuming a relatively equal weekly training volume. Either way, if you choose lower frequency, higher volume per workout, or higher frequency, lower volume per workout, you can expect to see excellent results.
One potential disadvantage of using push/pull splits is that higher frequencies result in fewer rest days. Therefore, while you’ll be resting your pulling muscles on push days and vice versa, there won’t be as many days of total rest. This can cause some people to feel more sore throughout the week than if they completed fewer workouts at a higher training volume.
However, this all comes down to personal preference and is something you’ll get a sense for as you become more experienced in your strength training journey.
Yanking yourself back in shape has never been so easy with our game-changing fitness app! Start transforming your life with BetterMe !
How Many Sets for Calisthenics Push Day?
The number of sets for calisthenics push day is dependent on various factors as everyone responds differently to training methods. Some of these factors include:
- Sex
- Age
- Medical conditions
- Previous exercise experience
- Goals
For Newbies
The most important thing when starting any new form of exercise is to start slowly. Many individuals try to do too much, too soon as they’re either excited about starting their new journey, believe that it will lead to faster improvements, or a combination of the two. In reality, beginners should start with relatively few exercises at a very attainable level of difficulty. It is best to start a little too easy than a little too difficult as this allows for decreased risk of injury and burnout, in addition to increased progressive overload capacity.
A beginner calisthenic push workout should include 2-3 sets of 3-5 exercises that are at a level of difficulty and can be performed for somewhere between 10-15 reps each set. Starting with higher rep ranges and lower intensity can ensure you experience significant neuromuscular adaptation and develop a good understanding of proper movement patterns before you increase the difficulty.
It’s also essential that you incorporate adequate rest time between sets in your workout and between workouts in your week. Two to three days per week of strength training is a good place to start for beginners.
Intermediate and Advanced
As you gain experience and build a solid base of fitness, you can start to progress your program based on how your body responds best. After several months and years of training, you’ll understand what frequency, workout split, rest intervals, and preferences you have when developing your routine.
While there’s no one-size-fits-all exercise program, intermediate to advanced trainees can typically (gradually) increase their overall training volume through a higher training frequency and volume (sets and overall reps per workout). This doesn’t mean you need to increase your repetitions for each exercise, unless you prefer to do so. Many advanced athletes prefer to increase the difficulty of their exercises and keep the rep ranges lower for the majority of their workout as they’re more likely to experience strength gains this way. Others prefer high-intensity interval training (HIIT) workouts where they use limited rest time and high repetitions to challenge their endurance and strength at the same time. While HIIT workouts typically have a higher caloric expenditure per workout than the higher resistance, lower rep variation, strength gains typically come more slowly as there must be some sacrifice of strength for endurance.
What Are Calisthenics Push-Ups for Beginners?
Calisthenics Push-Ups for beginners have variations that target multiple muscle groups. Push-ups can easily be adapted to any fitness level. Beginners may choose to start with wall push-ups or countertop push-ups to develop their initial form and strength. When you’re ready to progress, here are a few good options for the next steps:
Incline Push-Up
To perform this push-up variation, you’ll need to use an elevated stable surface such as a step or a stable chair.
How to do the push-up:
- Place your hands on a bench or sturdy table slightly wider than shoulder-width apart.
- Step back with your feet – the further you place your feet, the harder it will be to complete the push-up.
- Lower yourself down to have your chest touch the surface, then push back up to the starting position.
- Keep your core engaged through the entire movement.
Wide-Grip Push-Ups
How to do the push-up:
- Get in a plank position with hands positioned wider than shoulder-width apart.
- Plant your hands firmly onto the floor.
- Bend your elbows outwards and lower yourself to the floor.
- As your chest touches the floor, drive your body back to the initial position by pushing your hands into the ground.
- Ensure your core is tight throughout the movement.
Kneeling Push-Up
The kneeling push-up is one of the easiest parts of the routine, which makes it a suitable beginner option.
How to do the kneeling push-up:
- Get on your hands and knees, keeping your hands slightly wider than shoulder-width apart.
- Lean forward and plant your hands firmly on the floor.
- Avoid arching your body, keeping your core engaged.
- Lower your body as far as you can control and push back up to the starting position.
Read more: The Simplest Lower Back Calisthenics Guide for Beginners
Can You Get a Big Chest with Calisthenics?
Developing well-defined pectorals is possible with calisthenic exercises, the same as it is with traditional weightlifting, assuming you’re providing an adequate training stimulus to elicit muscle growth. According to a 2016 study, pectoralis major muscle activity is greatest with neutral (approximately shoulder-width apart) and narrow (approximately 50% inward from shoulder width) hand placement. Wide hand placement places the greatest focus on the serratus anterior (2).
If you want to gain more muscle and a well-pronounced chest, check out these top 6 home-based exercises. Spoiler: they aren’t for beginners.
Exercise #1: Tight Push-Ups
Tight push-ups are excellent variations that engage your chest muscles holistically.
How to perform:
- Place your hands under your chest with your thumbs touching. Point your fingers to the front.
- Lower your chest to the floor, trying not to flare out your elbows from your torso.
- Push yourself up off the floor and extend your arms at the top of the rep.
Exercise #2: Archer Push-Ups
Archer push-ups help you prepare for one-arm variations that target chest muscles.
How to perform:
- Get in a high plank position with your hands wider than shoulder-width apart.
- Lower your body and bend one elbow while keeping the other arm straight.
- Push up from this position, then switch the sides.
- Count one repetition when you change the position.
Exercise #3: Decline Push-Ups
Decline push-ups target your upper chest and shoulder muscles.
How to perform:
- Position your hands on the ground, keeping your elbows at a 45-degree angle and your shoulders over your wrists.
- Place your feet on an elevated surface.
- Lower your chest toward the floor while maintaining a straight line with your body from shoulders to heels.
- Push back up onto the floor to return to the starting position.
Exercise #4: One-Arm Push-Ups
This advanced push-up will amp up your upper body and core strength.
How to perform:
- Get in a plank position with your shoulders stacked over your wrists and your feet hip-distance apart.
- With your core engaged, lift your left hand off the ground, moving it behind your back.
- Bend your right elbow and lower your body toward the floor.
- Push off the floor to return to the starting position.
- Repeat the same number of repetitions on both arms.
Exercise #5: Handstand Push-Up
You can perform a handstand push-up against a wall. This variation helps increase shoulder strength and improve stability. It is one of the most difficult push-up variations.
How to perform:
- Position your hands a bit wider than shoulder-width apart approximately 6-10 inches away from the wall. Make sure your palms are facing forward.
- Get into a handstand position with your heels touching the wall.
- As you get in the handstand position, ensure your body is straight and tight.
- Lower yourself slowly until the top of your head touches the floor, keeping your elbows at a 45-degree angle.
- Push back up until your elbows are fully extended. Maintain tightness in your body the entire time.
Exercise #6: Clap Push-Up
Another demanding push-up variation that engages your chest, arm, and shoulder muscles.
How to perform:
- Start in the plank position with your hands wider than shoulder-width apart.
- Breathe in and with your core engaged, bend your elbows to lower your chest to the floor.
- Breathe out and forcefully push your body up by extending your arms and lifting your hands off the floor, clapping them together.
- Land placing your hands back on the floor and keeping a soft bend in your elbows.
If you wish to cinch your waist, tone up your bat wings, blast away the muffin top – our fitness app was created to cater to all your needs! BetterMe won’t give excess weight a chance!
A common recommendation for the calisthenic push-to-pull ratio is 1:2, which means one push movement should be accompanied by twice as many pulls. However, this is highly dependent on the intensity of each type of exercise you’re performing and is not a rule. You should try to aim for at least a 1:1 push-to-pull ratio. As with most things in fitness, the answer to which calisthenics workout is best is…it depends. There are almost unlimited options when it comes to calisthenic programming and every option has its advantages and disadvantages based on your goals. While there is no “best” calisthenics workout, you can craft what’s best for you by forming clear goals and creating your program accordingly. Consulting a certified personal trainer, strength coach, or physical therapist is an excellent place to start if you need some help. Neither is better or worse than the other, and both can and have provided wonderful benefits for many people. You won’t know what’s better for you until you have a little training experience and have had the time to try both of them out. Even for advanced trainees, mixing up training splits is a great way to keep your routine interesting and provide a different stimulus for increased muscle adaptations. Yes, push/pull splits can be incredibly effective for building strength and muscle. As previously mentioned, make sure you also prioritize the rest your body needs to avoid injury and burnout. FAQs
What is a good push-to-pull ratio for calisthenics?
Which calisthenic workout is best?
Is a push/pull split better than an upper/lower split?
Is push/pull an effective training split?
The Bottom Line
Calisthenics utilizes your body weight as resistance, which makes it an incredibly accessible and versatile strength training option. Today, we focused on the push/pull training split with specific examples of calisthenic pushing exercise variations from beginner to advanced.
If you’re looking to start your strength training journey, calisthenics is the perfect place to start. Remember to start slow and progress gradually. Before you know it, you’ll be doing things you never thought possible.
DISCLAIMER:
This article is intended for general informational purposes only and does not serve to address individual circumstances. It is not a substitute for professional advice or help and should not be relied on for making any kind of decision-making. Any action taken as a direct or indirect result of the information in this article is entirely at your own risk and is your sole responsibility.
BetterMe, its content staff, and its medical advisors accept no responsibility for inaccuracies, errors, misstatements, inconsistencies, or omissions and specifically disclaim any liability, loss or risk, personal, professional or otherwise, which may be incurred as a consequence, directly or indirectly, of the use and/or application of any content.
You should always seek the advice of your physician or other qualified health provider with any questions you may have regarding a medical condition or your specific situation. Never disregard professional medical advice or delay seeking it because of BetterMe content. If you suspect or think you may have a medical emergency, call your doctor.
SOURCES
- A Comparison Between Total Body and Split Routine Resistance Training Programs in Trained Men (2021, ncbi.nlm.nih.gov)
- Effect of the push-up exercise at different palmar width on muscle activities (2016, ncbi.nlm.nih.gov)
- What is calisthenics? (2020, medicalnewstoday.com)


