Starting your calisthenics journey can feel overwhelming when you see athletes performing human flags and one-arm handstands. But here’s the truth: every advanced practitioner started with the same foundational movements you’re about to learn.
This guide outlines the essential calisthenics skills for beginners in the exact order you should master them. By following this progression-based approach, you’ll build the strength, stability, and coordination needed for more advanced moves while minimizing injury risk.
Whether you’re completely new to bodyweight training or looking to structure your approach more effectively, these six fundamental skills will form the foundation of your calisthenics practice.
Can I Learn Calisthenics by Myself?
Yes, you absolutely can learn calisthenics independently. Thousands of practitioners have successfully developed impressive strength and skills through self-directed training.
However, success requires dedication and the correct approach. You’ll need to commit to consistent practice, typically 3-5 sessions per week for several months to see significant progress (1). Most importantly, you must prioritize proper form over ego-driven progression.
The key resources for self-learning include:
- Video tutorials from established calisthenics practitioners
- Progression charts that map out skill development pathways
- Online communities for feedback and motivation
- Basic equipment such as a pull-up bar and resistance bands
Start with the fundamentals that are outlined in this guide, focus on quality movement patterns, and be patient with your progress. Remember, calisthenics skills take time to develop, but the journey can be incredibly rewarding.
If you’re looking for specific movements to practice, check out our guide to calisthenics poses for detailed form instructions.
Read more: Full-Body Calisthenics Exercises: How to Get Ripped Without Touching a Single Weight
How to Learn Calisthenics Step by Step
- Start with Movement Assessment
Before you jump into training, evaluate your current movement capacity. Test your ability to perform basic patterns such as squatting, pushing, and pulling. This assessment helps identify limitations and prevents injury during progression (2).
- Master Basic Progressions First
Each calisthenics skill follows a logical progression from easy to more challenging variations. Never skip steps – your body needs time to adapt to new movement patterns and develop the necessary strength (3).
- Focus on Form Over Repetitions
Quality always trumps quantity in calisthenics. Performing 5 perfect push-ups builds more strength and reduces injury risk compared to 15 sloppy ones. Each repetition should demonstrate complete control through the full range of motion (4).
- Implement Progressive Overload
Once you can perform 8-12 repetitions of a movement with perfect form, progress to the next variation. This systematic approach ensures continuous strength development without overwhelming your system (5).
- Train Consistently
Aim for 3-4 training sessions per week, allowing at least 24 hours between sessions (6). Consistency over intensity drives long-term results in bodyweight training.
- Listen to Your Body
Calisthenics places unique demands on your joints and connective tissues. If you experience pain or excessive fatigue, take additional rest days. Your body adapts during recovery, not just during training (7).
Whether you’re a workout beast or just a beginner making your first foray into the world of fitness and dieting – BetterMe has a lot to offer to both newbies and experts! Install the app and experience the versatility first-hand!
In What Order Should You Learn Calisthenics Skills?
There isn’t a single “official” order in which to learn calisthenics skills that applies to everyone – following a progressive pathway works best:
- Lay stable foundations
- Add leverage
- Add intensity/complexity.
Calisthenics is a journey of progressive overload where you master one variation of an exercise before moving to a more challenging one. This structured approach builds strength safely and efficiently.
The progressions below show how foundational movements evolve into highly advanced skills. Think of each list as a roadmap for a specific area of strength.
Here’s a structured order for each main category:
Horizontal Pull Progression
Pulling horizontally develops your back, biceps, and scapular stability. Start with easier angles and progress to more challenging body positions.
- Beginner:
- Vertical row (standing, rings, or bar at chest height)
- Incline row (more horizontal, feet on ground, body at an angle)
- Row (body closer to parallel to the floor)
- Intermediate:
- Wide row (wide grip for more upper back)
- Archer row (alternating emphasis, prep for one-arm work)
- L-hang row (added core challenge)
- Advanced:
- One arm row (unsupported)
- Advanced front lever rows (e.g. tuck FL row, straddle FL row, front lever row)
- High one-arm pull-up
Vertical Pull Progression
Vertical pulling (e.g. pull-ups) is foundational for upper-body strength. Progress by reducing assistance and increasing range of motion.
- Beginner:
- Scapular pull (shoulder blades only)
- Assisted pull-up (band or foot support)
- Pull-up negative (slow lower from the bar)
- Intermediate:
- Pull-up (unassisted)
- Chest-to-bar pull-up (C2B)
- L-sit pull-up (adds core)
- Advanced:
- Muscle up (strict form)
- Archer pull-up
- One-arm pull-up (progressions: assisted, negative, full)
- Typewriter pull-up
Horizontal Push Progression
Horizontal pushing (push-ups) targets the chest, shoulders, and triceps. Start with a surface that makes it easy and progress to harder angles and one-arm versions.
- Beginner:
- Incline push-up (hands elevated)
- Push-up (standard, floor)
- Knee push-up (if needed)
- Intermediate:
- Diamond push-up (closer hands)
- Decline push-up (feet elevated)
- Pseudo planche push-up (shoulders forward)
- Advanced:
- Archer push-up
- One-arm push-up
- Planche lean/planche progressions
Vertical Push Progression
This path builds overhead strength and coordination, which sets the stage for handstand-related skills.
- Beginner:
- Pike push-up (hips high, mimics overhead press)
- Wall plank (feet on wall, shoulders loaded)
- Wall-supported handstand (hold, stomach to wall for best form)
- Intermediate:
- Elevated pike push-up (feet on box)
- Wall handstand push-up (partial range, progress to full ROM)
- Freestanding handstand (balance practice)
- Advanced:
- Freestanding handstand push-up
- One-arm handstand (progressions)
- Full planche/press to handstand
Core Progression
Core strength keeps you stable and safe, and powers every movement.
- Beginner:
- Dead bug or tuck-up crunch
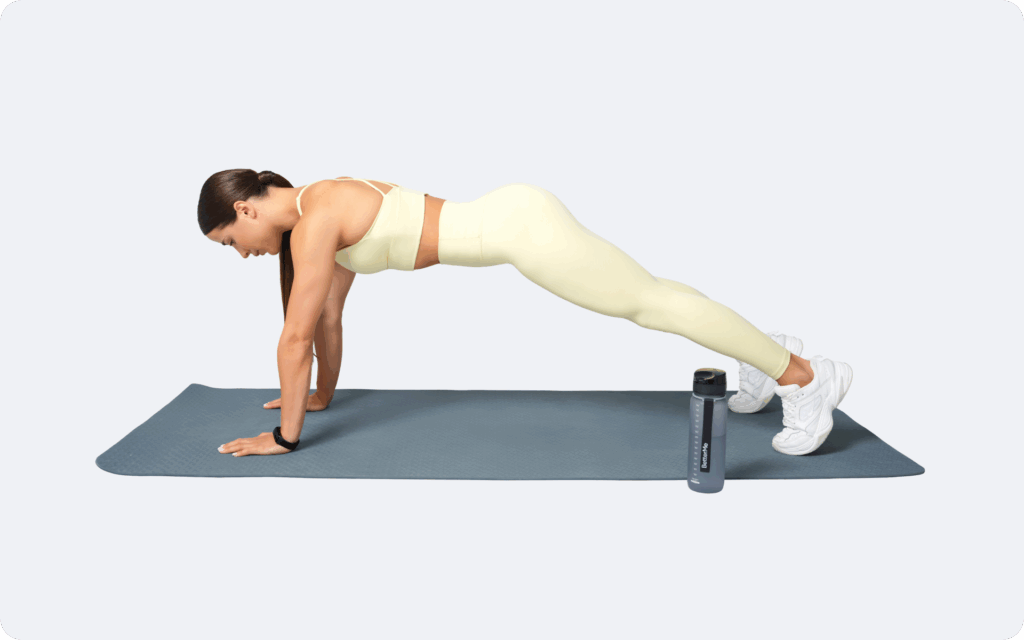
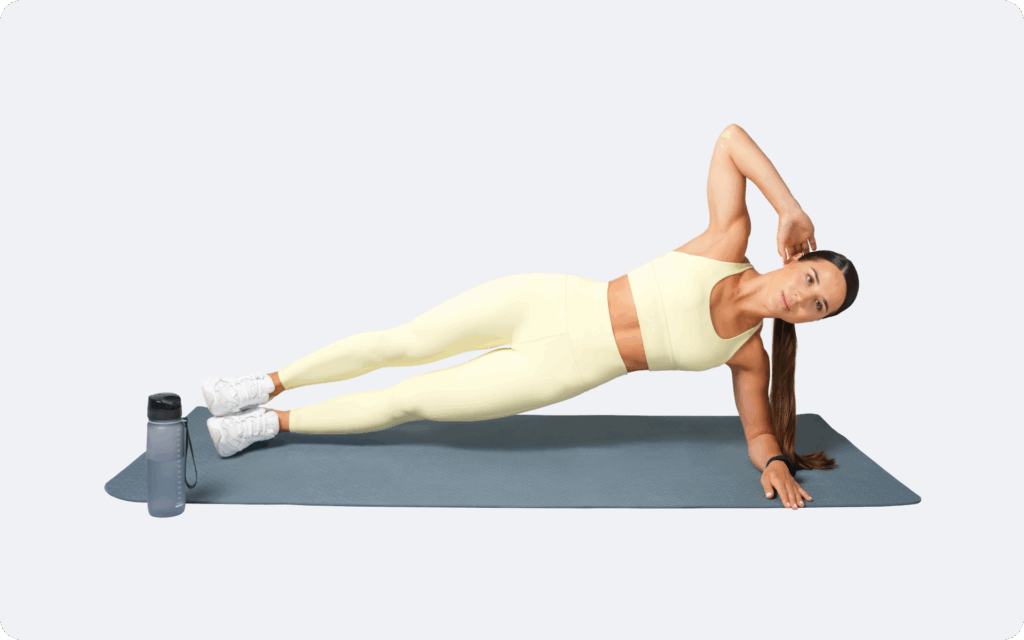
- Plank (front and side)
- Hollow body hold (tuck, one leg out, full extension)
- Intermediate:
- Hanging knee raise
- Hanging leg raise (progress toward toes-to-bar)
- Arch body hold and Superman
- Advanced:
- Dragon flag (tuck, advanced tuck, full)
- Hanging windshield wipers
- Front/back lever holds (progressions)
Legs Progression
Strong lower-body work improves balance, control, and overall power. Progressions build both strength and mobility.
- Beginner:
- Assisted squat (hold on to something for support)
- Bodyweight squat (full range)
- Split squat/Bulgarian split squat
- Intermediate:
- Step-up (find a box or sturdy step)
- Lunge variations (forward, reverse, lateral)
- Cossack squat
- Partial pistol squat or assisted pistol squat
- Advanced:
- Pistol squat (full depth, controlled)
- Shrimp squat (progressively harder variations)
- Nordic hamstring curl (negative, then full)
Read more: Easy Calisthenics Moves That Actually Work: A No-Nonsense Beginner’s Guide
Which Calisthenics Skill Should I Learn First?
While the full progression charts show endless possibilities, you don’t need to learn everything at once. Focusing on a handful of foundational skills will build the strength, stability, and coordination that are needed for every advanced move you hope to achieve later.
Here are the essential skills that may be worth prioritizing when you’re starting out.
Note that these benchmarks aren’t a standard for all, and you may set benchmarks for yourself, as long as you’re progressing over time.
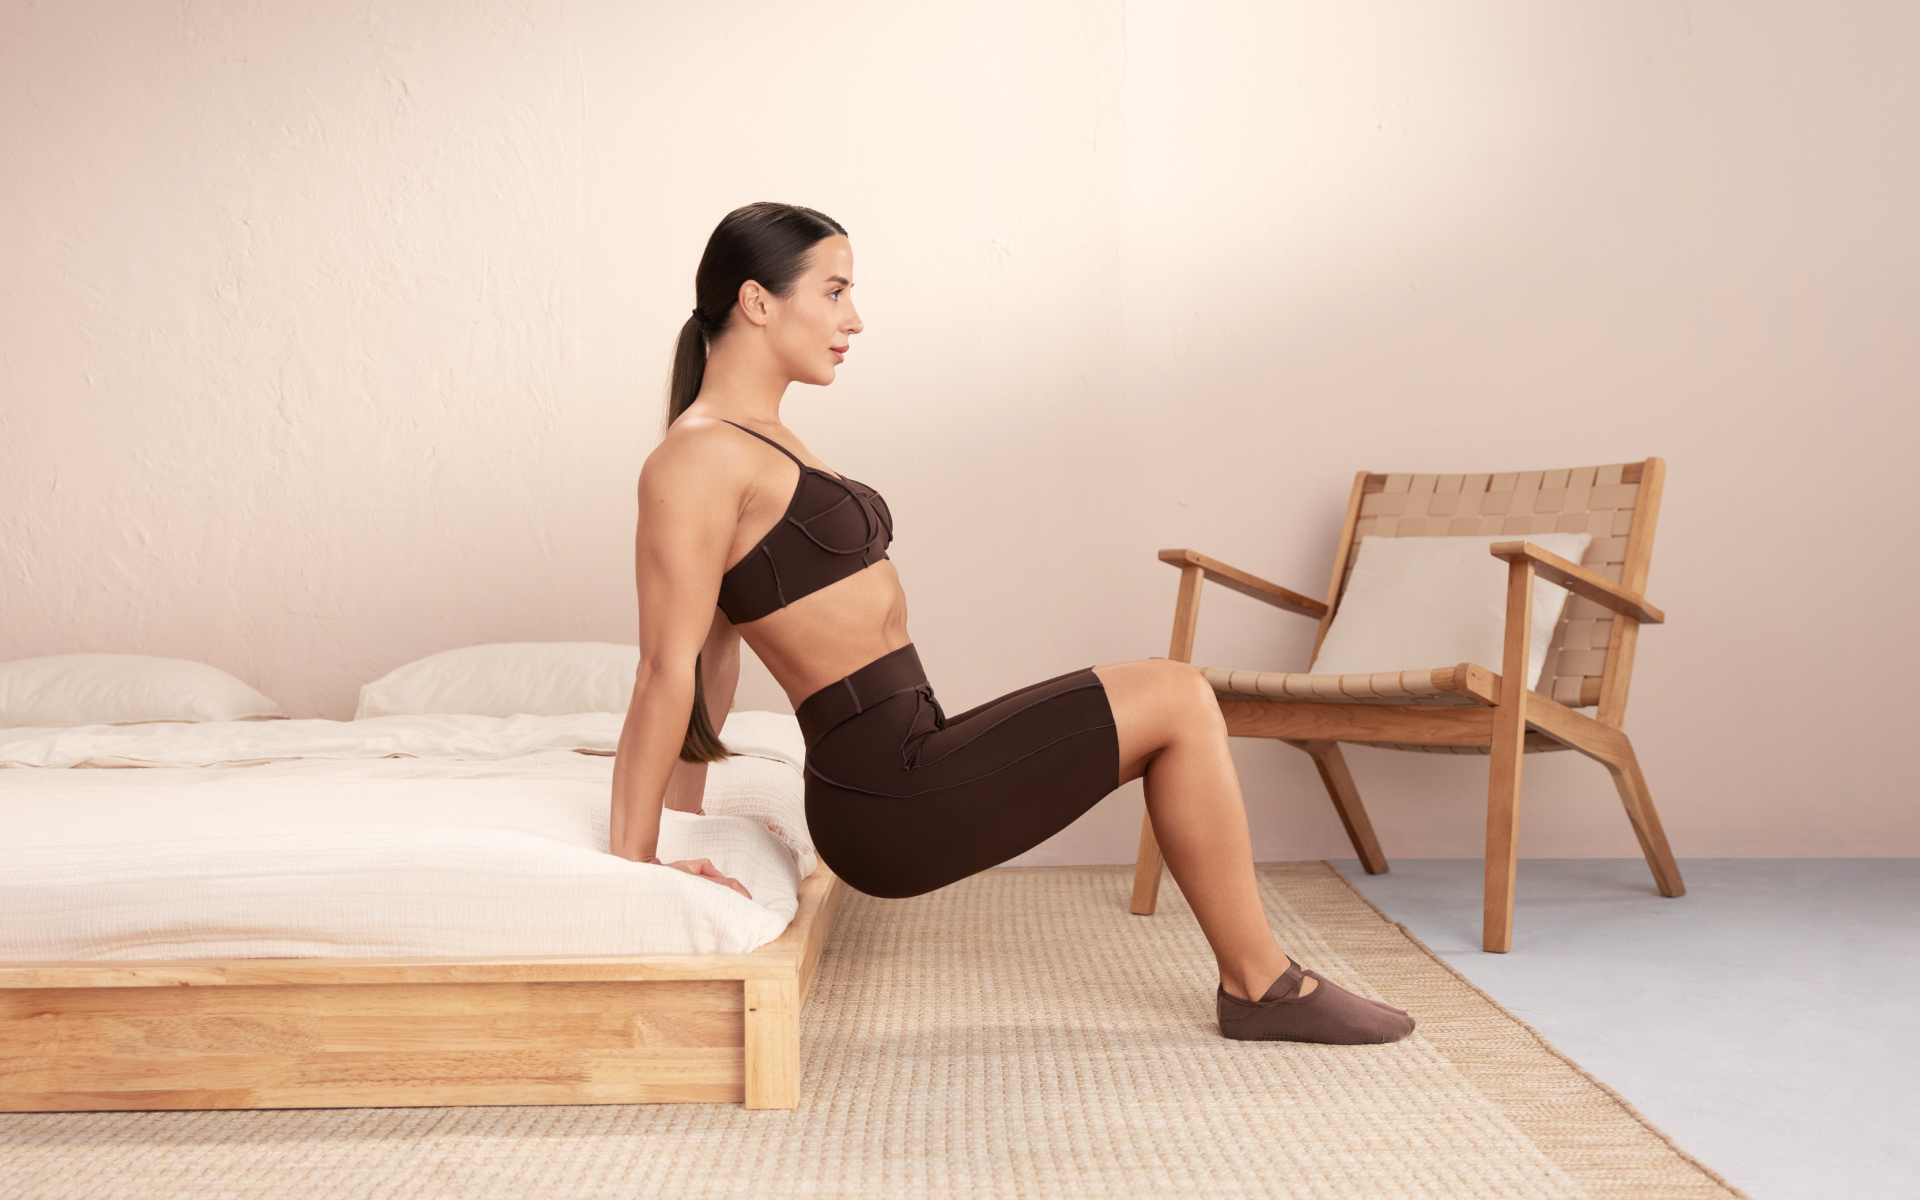
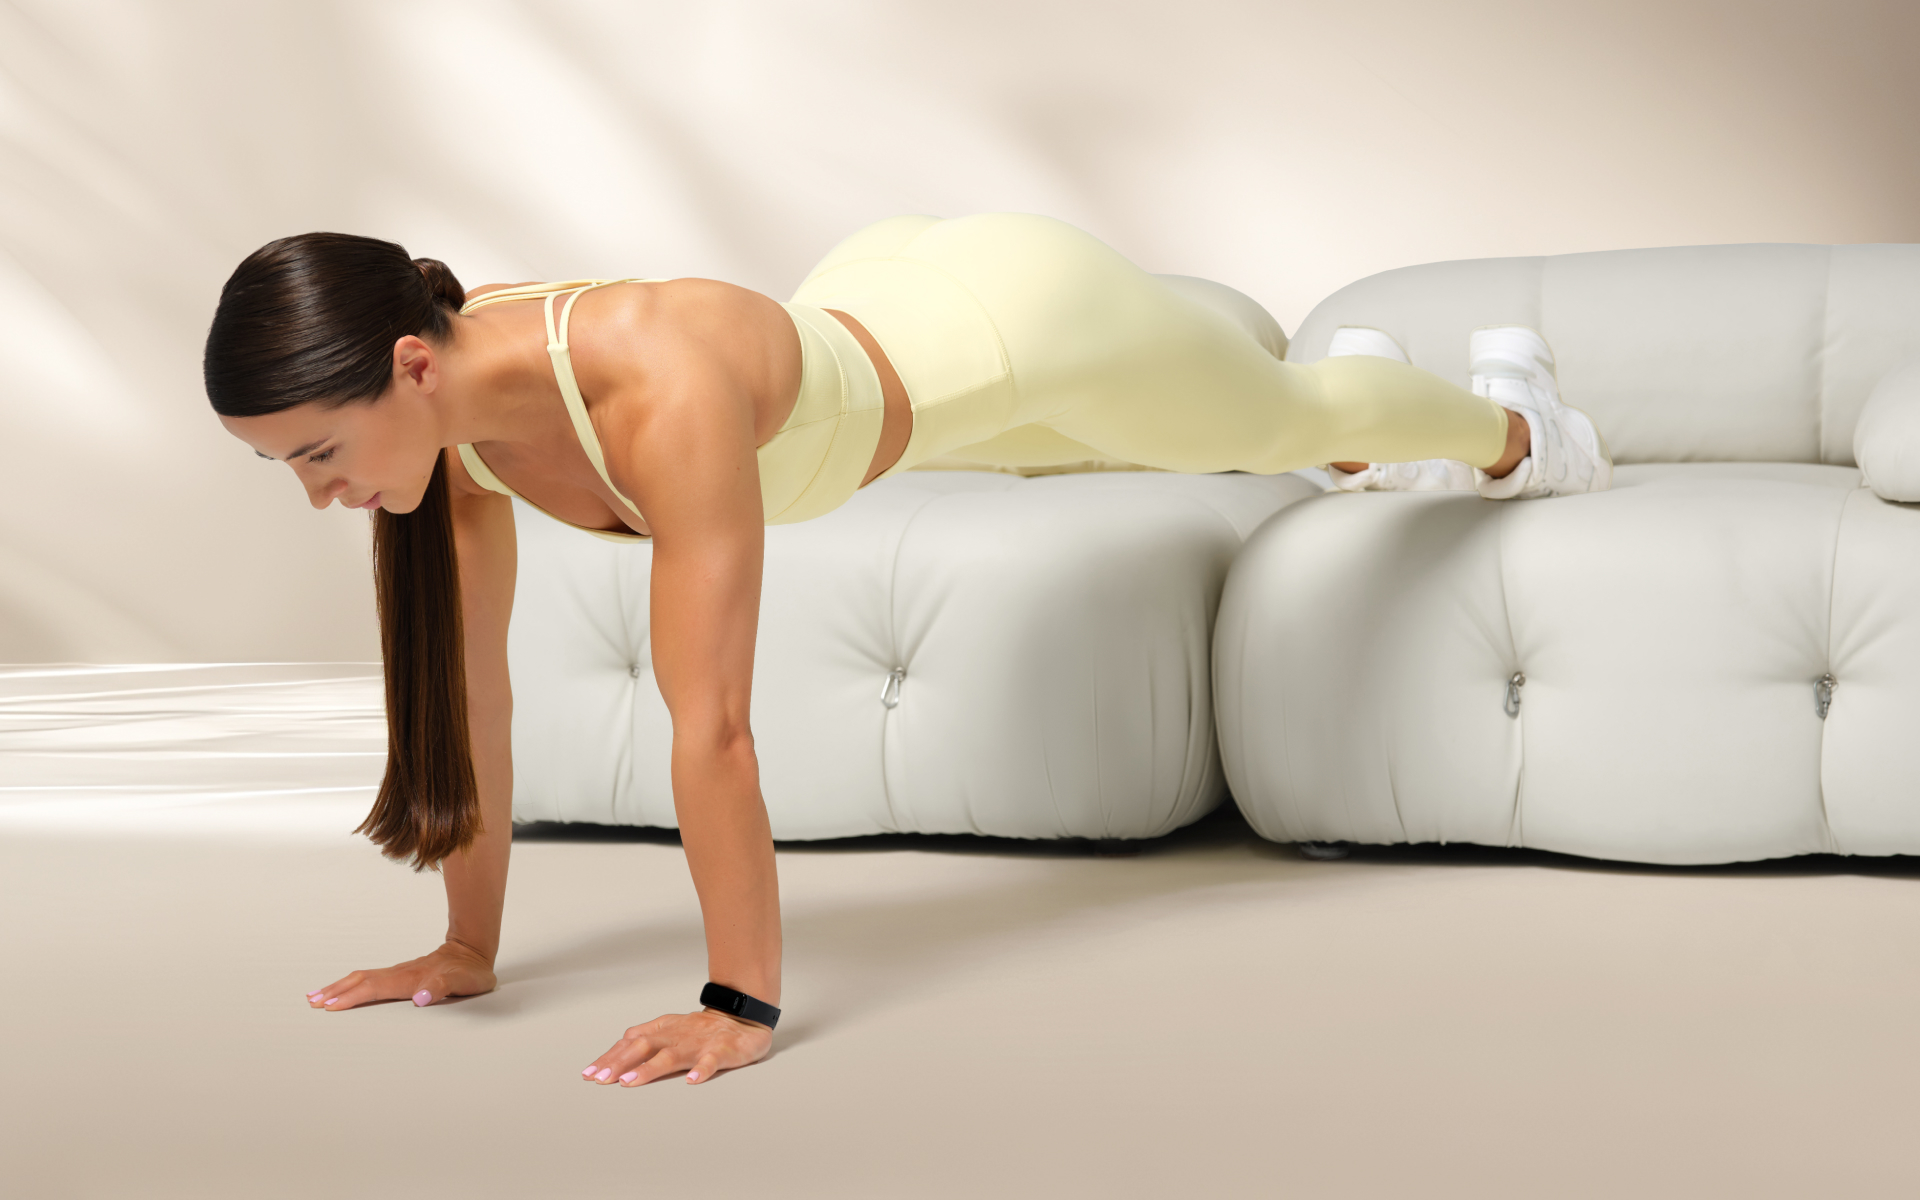
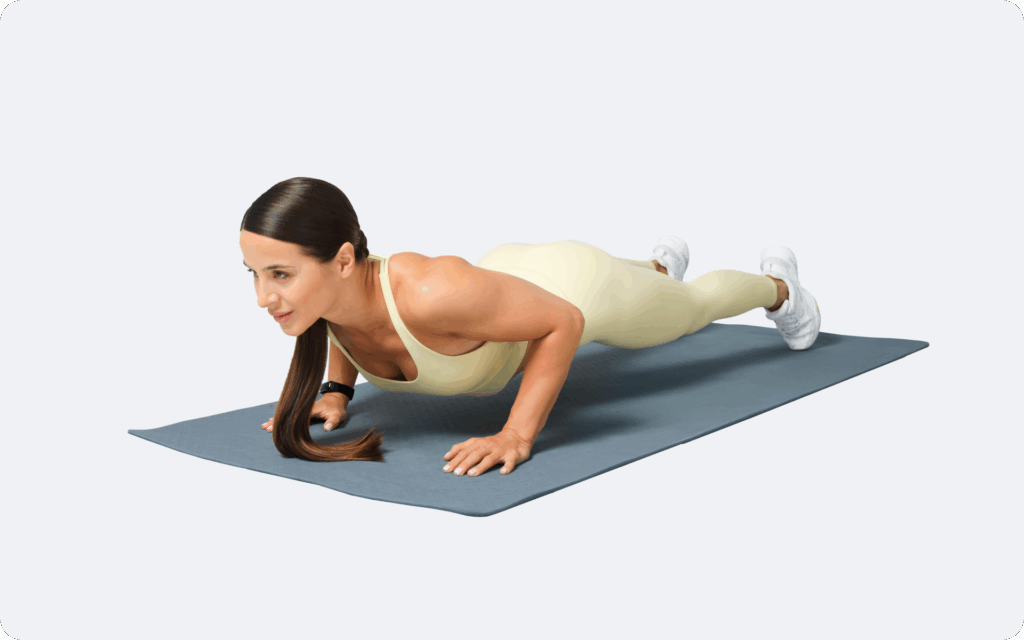
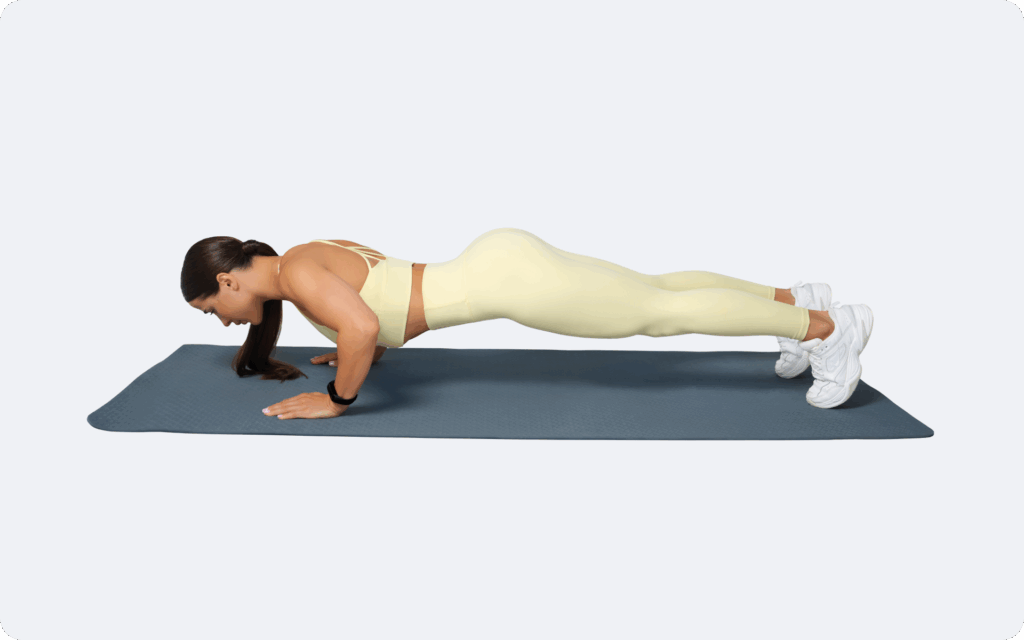
The Push-Up
Why this skill: The push-up is the cornerstone of all pressing strength. It teaches you to control your body as a single, rigid unit while building fundamental strength in your chest, shoulders, and triceps. Mastering it prepares you for dips, handstands, and eventually the planche.
Progression Steps:
- Incline Push-Up: Find a raised surface such as a bench or countertop. The higher the surface, the easier it is.
- Push-Up: Perform the movement on the floor, keeping your body in a straight line from your head to your heels.
- Diamond Push-Up: Bring your hands closer together, forming a diamond shape with your thumbs and index fingers to place more emphasis on your triceps.
- PP Push-Up (Pseudo Planche Push-Up): Place your hands closer to your hips and lean your shoulders forward to increase the difficulty.
Success Benchmark: Aim for 10-20 clean, full-range-of-motion push-ups before moving to more difficult variations.
The Row
Why this skill: Rowing is the opposite of pushing and is crucial for balancing your upper body strength. It builds a strong back and biceps, improves posture, and prepares your joints and muscles for the pull-up.
Progression Steps:
- Vertical Row: Using rings or a suspension trainer, stand mostly upright and pull your chest to your hands.
- Incline Row: Lean back further to increase the percentage of your body weight you’re pulling.
- Row: Position your body parallel to the floor, with your feet on the ground.
- Wide Row: Widen your grip to engage more of your upper back muscles.
Success Benchmark: You’re ready to progress when you can complete 10-15 controlled rows with your body nearly parallel to the floor.
The Pull-Up
Why this skill: The pull-up is a key vertical pulling movement and a major milestone in calisthenics. It develops a powerful back and grip, which are essential for more advanced skills such as muscle-ups and levers.
Progression Steps:
- Scapular Pull: While hanging from a bar, pull your shoulder blades down and together without bending your arms.
- Pull-Up Negative: Jump or use a box to get your chin over the bar, then slowly lower yourself down over 3-5 seconds.
- Assisted Pull-Up: Use a resistance band or have a partner support your legs to help you complete the full range of motion.
- Pull-Up: Perform the exercise without assistance, pulling your chin completely over the bar.
Success Benchmark: Consistently performing 3-5 full, unassisted pull-ups is a great sign that you’ve built foundational vertical pulling strength.
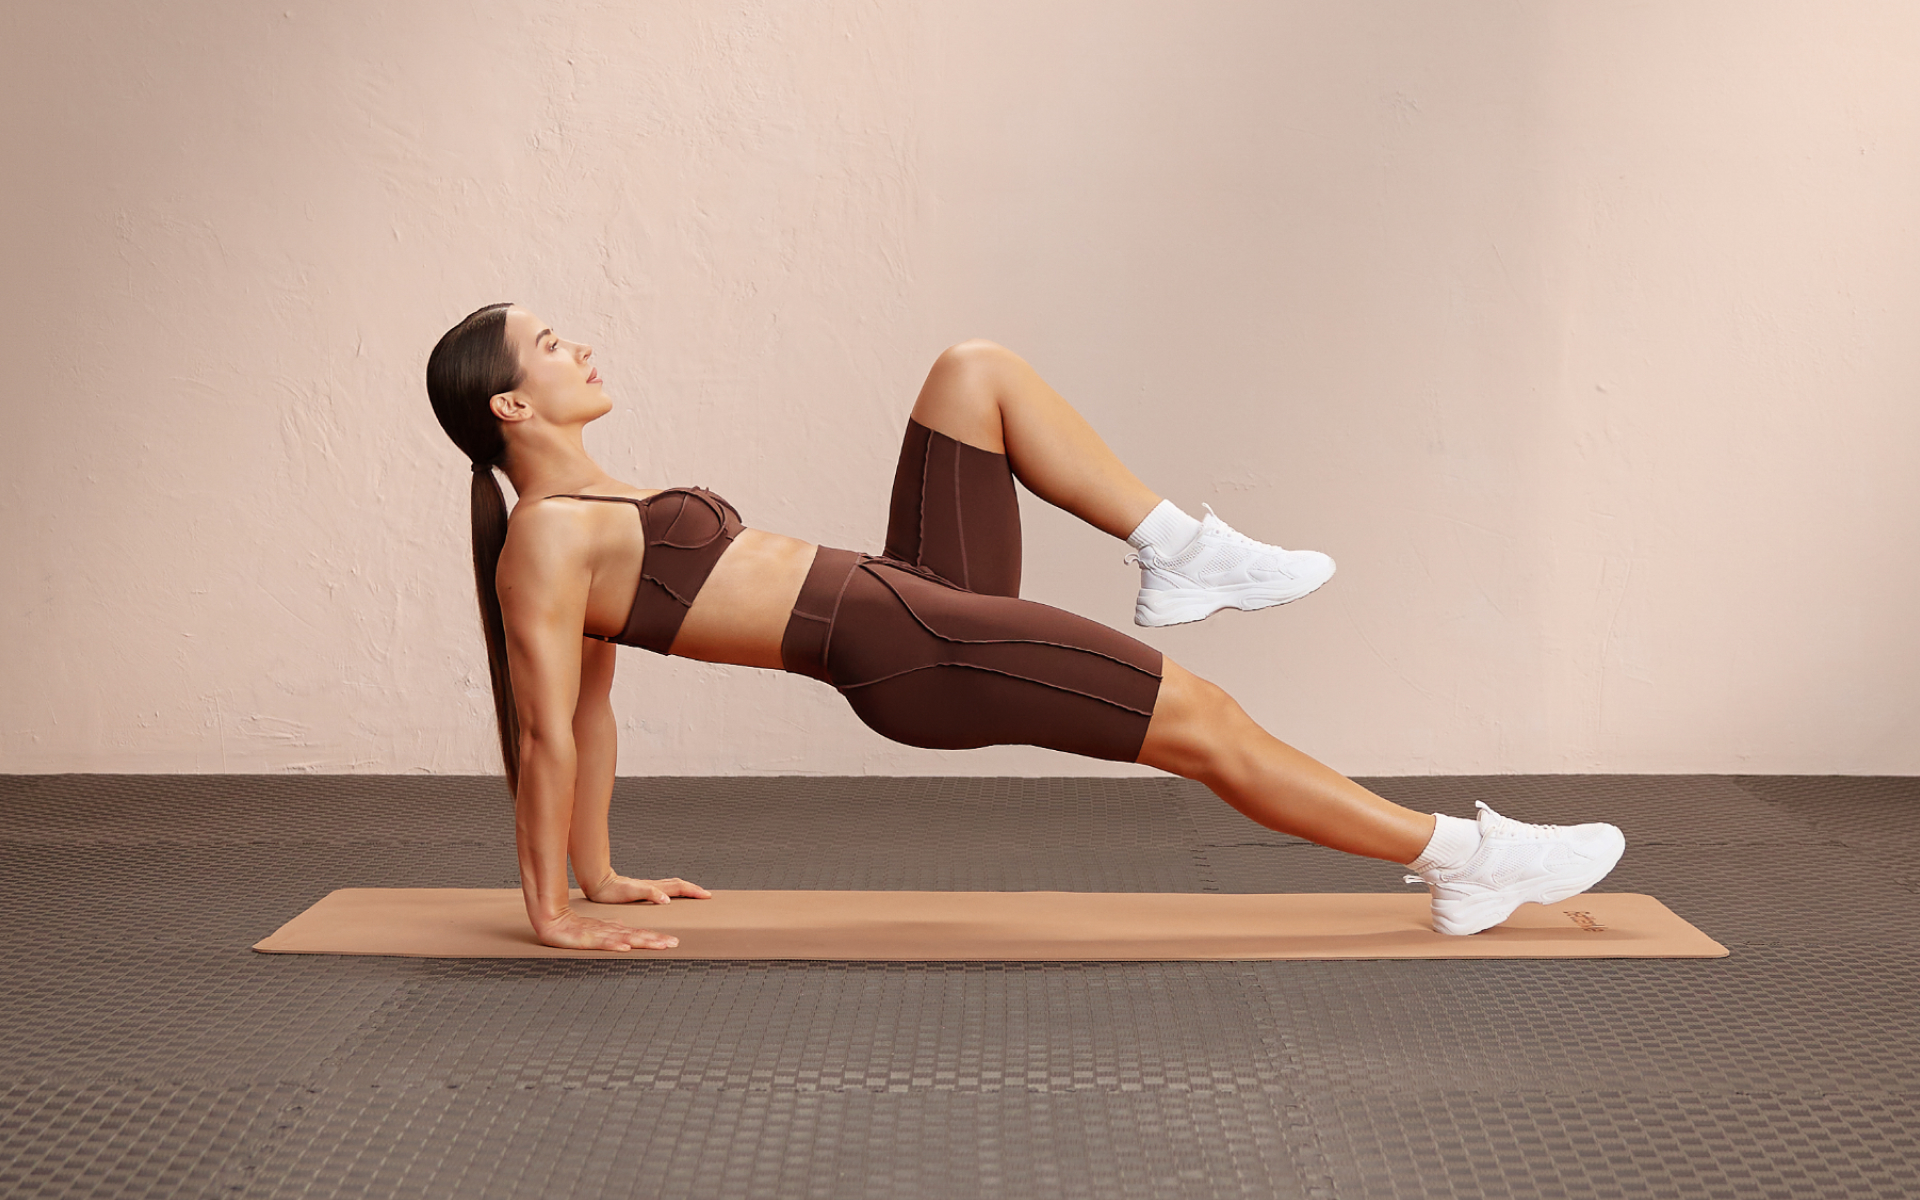
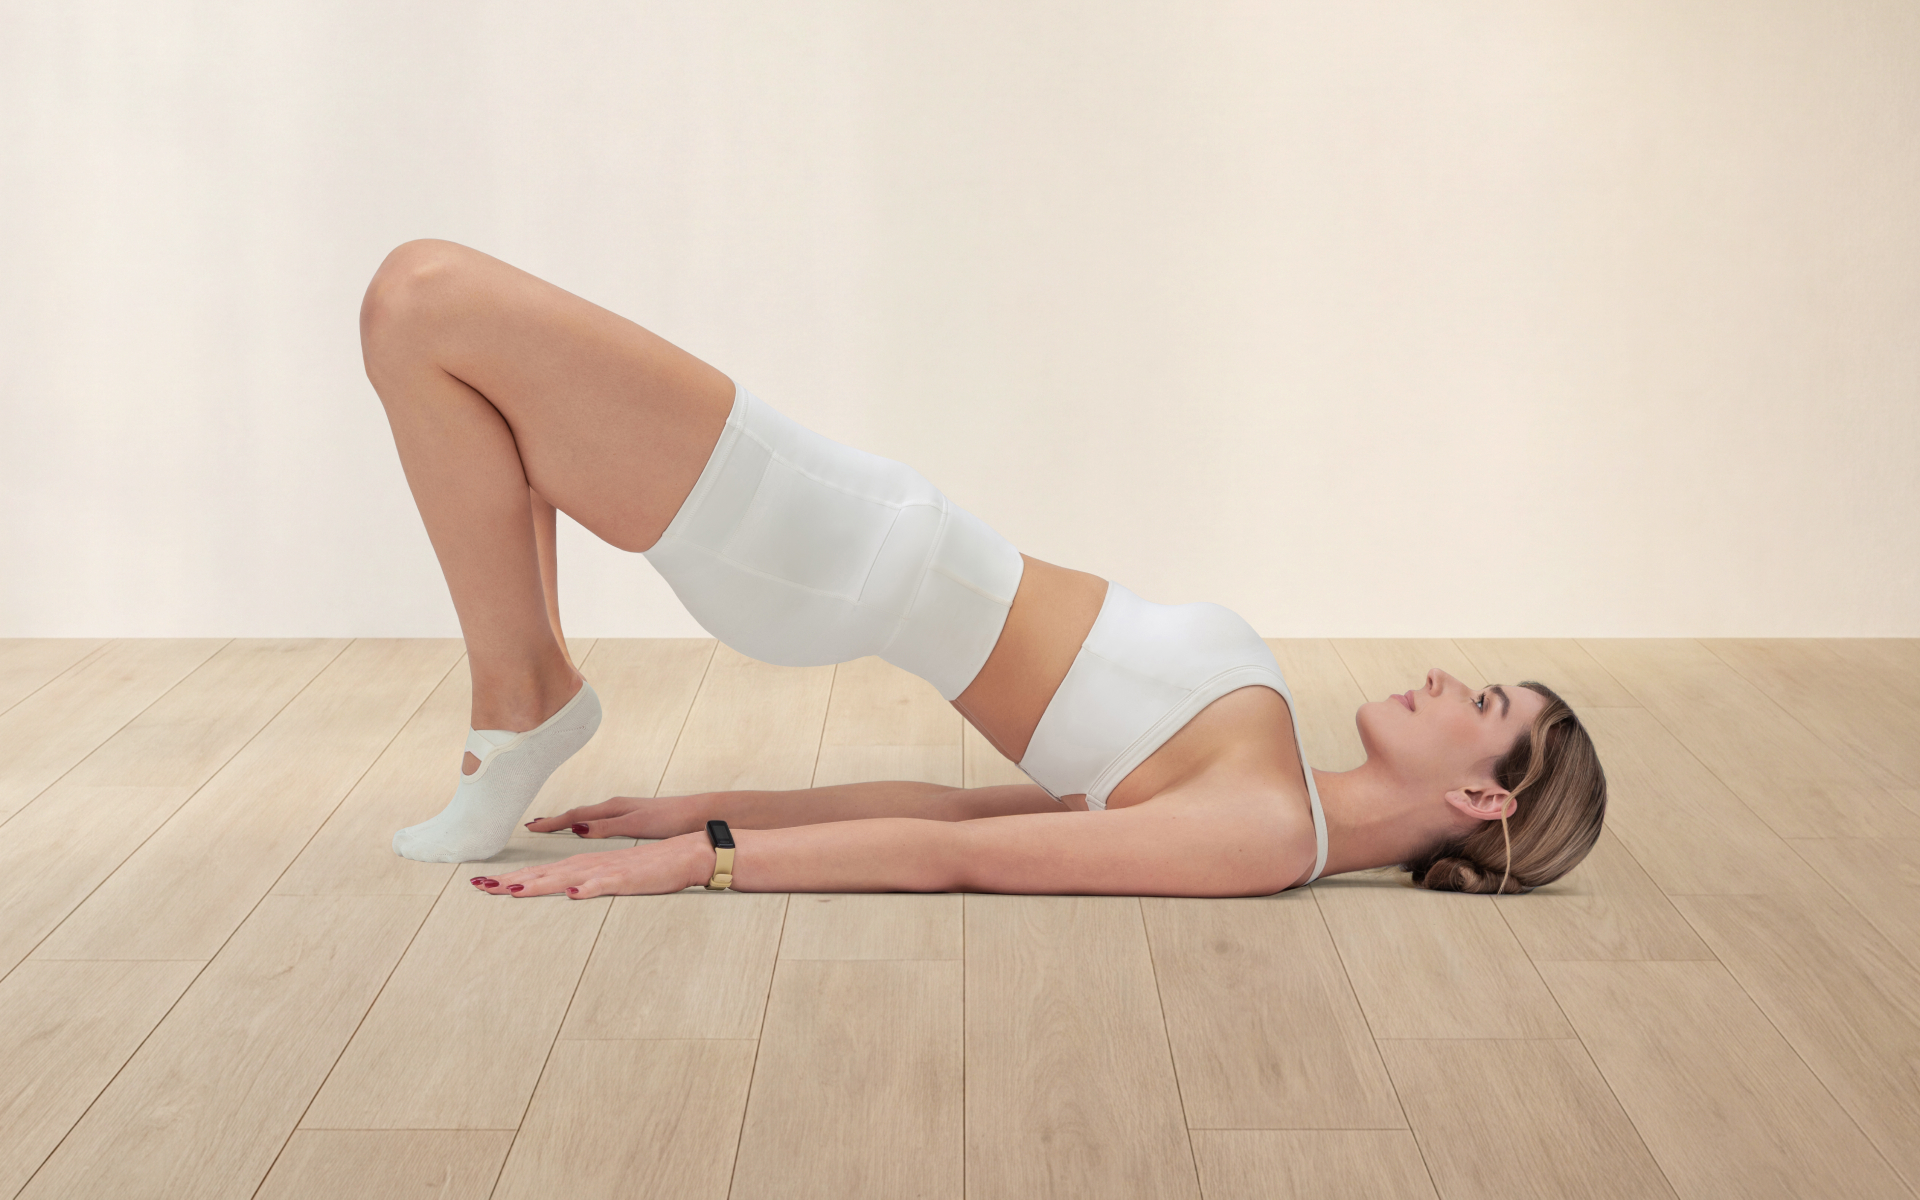
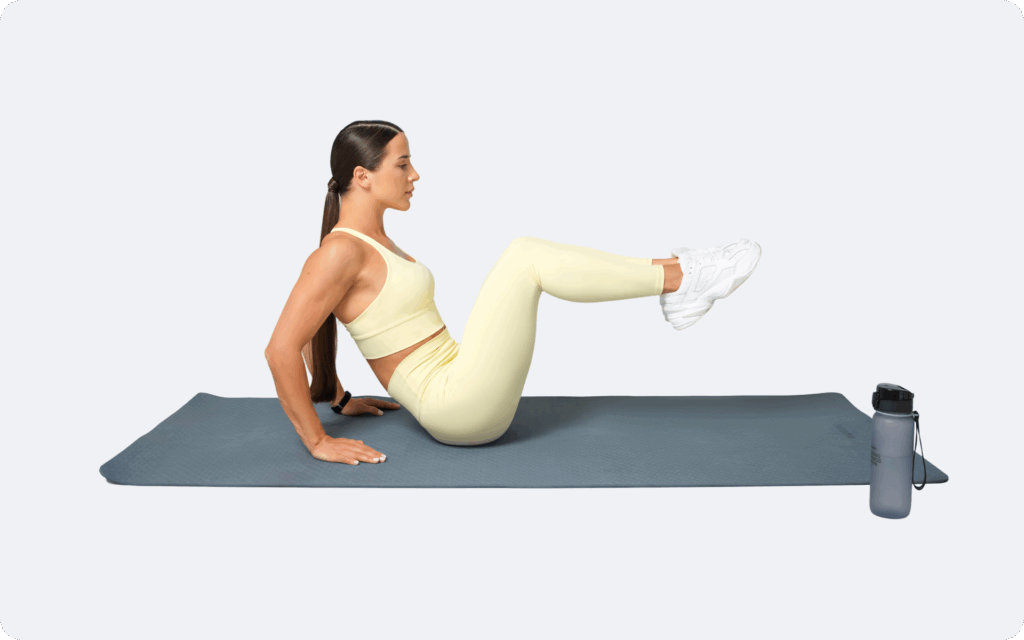
The Hollow Body Hold
Why this skill: This isn’t just an ab exercise, it’s the core of calisthenics. The hollow body position teaches you to create total-body tension, protecting your lower back and transferring force efficiently. It’s the secret to clean lines in handstands, levers, and planches.
Progression Steps:
- Tuck-Up Crunch: Lie on your back and bring your knees to your chest, lifting your shoulder blades off the floor.
- Tuck Hollow Hold: From the tuck position, extend your arms overhead. Keep your lower back pressed firmly into the floor.
- One Leg Hollow Hold: Extend one leg straight out while keeping the other tucked.
- Hollow Hold: Extend both legs and arms, creating a slight “banana” shape with your body.
Success Benchmark: Holding a perfect, stable hollow body hold for 45-60 seconds shows that your core is ready for more dynamic challenges.
Reasons why BetterMe is a safe bet: a wide range of calorie-blasting workouts, finger-licking recipes, 24/7 support, challenges that’ll keep you on your best game, and that just scratches the surface! Start using our app and watch the magic happen.
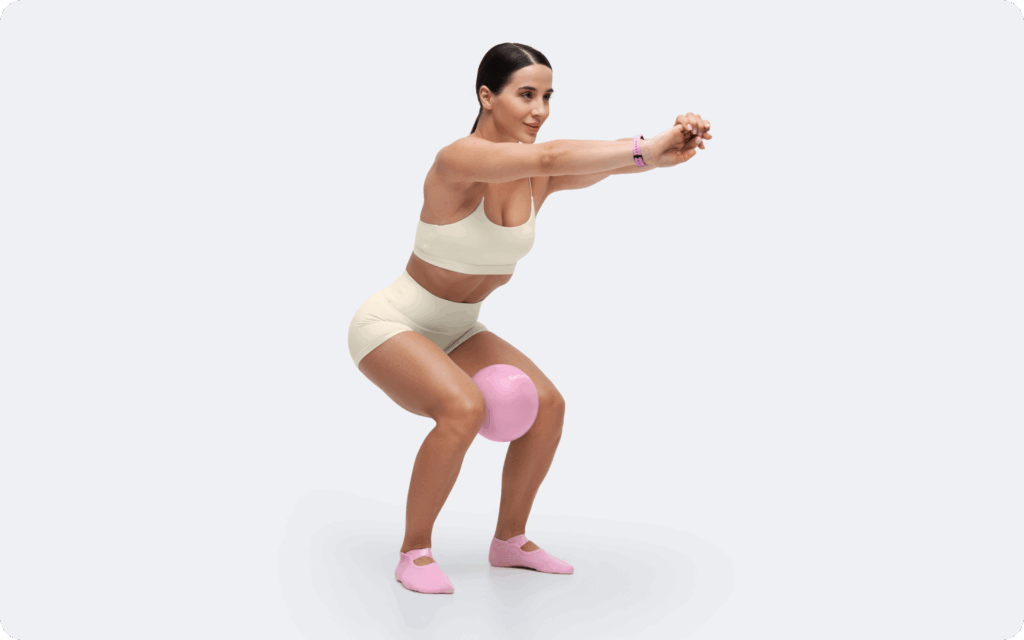
The Squat
Why this skill: Bodyweight squats build strong, mobile legs and hips, which provide the foundation for everything you do. Mastering the squat pattern leads to single-leg variations such as the pistol squat and explosive movements.
Progression Steps:
- Assisted Squat: Hold onto a doorframe or post to help with balance and depth.
- Parallel Squat: Squat down until your thighs are parallel to the floor, without assistance.
- Full Squat: Perform a deep squat, going as low as your ankle and hip mobility allow while keeping your heels on the ground.
- Split Squat: Step one foot forward and lower your back knee toward the ground, building single-leg stability.
Success Benchmark: Completing 20-30 consecutive full squats with good form indicates that your legs are strong enough to begin focusing on single-leg progressions.
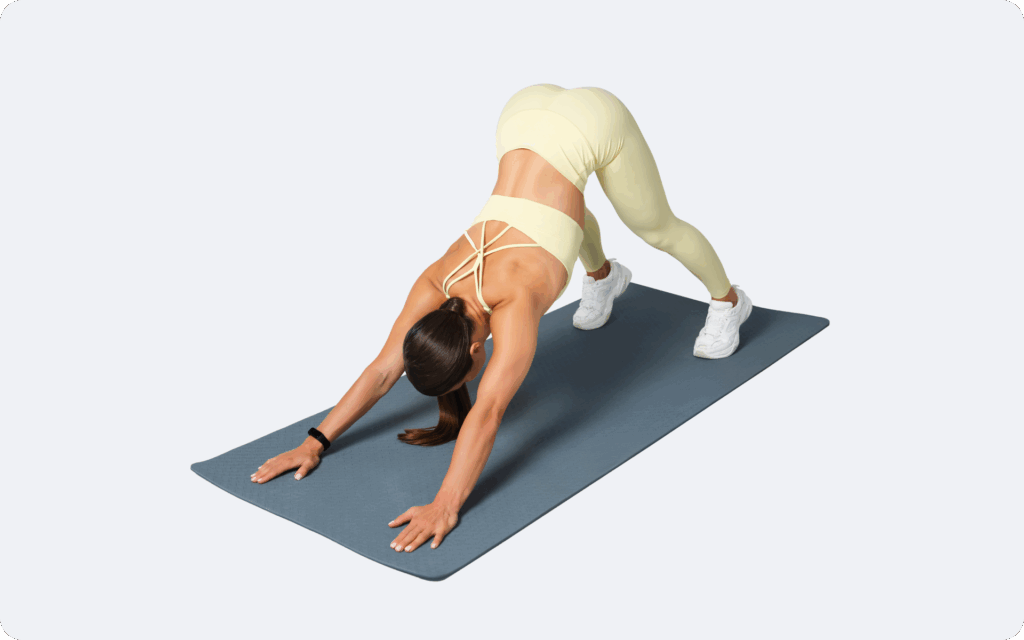
The Wall Handstand
Why this skill: Getting comfortable upside down is a mental and physical prerequisite for many of the most iconic calisthenics skills. The wall handstand builds shoulder strength, stability, and balance, which paves the way for handstand push-ups and freestanding handstands.
Progression Steps:
- Wall Plank: Place your feet on a wall with your hands on the floor, forming a 90-degree angle.
- Wall Headstand: Practice balancing on your head with your feet against the wall for support.
- Wall Handstand: Kick up or walk your feet up the wall to hold a handstand position, facing either toward or away from the wall.
- Handstand Shoulder Taps: While in a wall handstand, practice lifting one hand to tap the opposite shoulder to build stability.
Success Benchmark: Holding a wall-supported handstand for 30-60 seconds demonstrates that you have the necessary shoulder endurance to start working on balance.
For a comprehensive routine that incorporates these movements, explore our basic calisthenics workout guide.
Read more: Your No-Sweat Simple Calisthenics Workout Plan
How Long Does It Take to Learn Calisthenics?
Expect to spend 6-12 months mastering the foundational movements outlined above. This timeline assumes consistent training 3-4 times per week with proper progression and adequate recovery.
Your individual timeline depends on several factors:
Starting fitness level significantly impacts progression speed. Complete beginners may need the full 12 months, while those with some fitness background might achieve these milestones in 6-8 months.
Training consistency is the biggest determining factor. Missing weeks of training will extend your timeline, while maintaining regular practice accelerates progress.

Age and recovery capacity also play a role. Younger individuals typically progress faster, but proper programming allows practitioners of all ages to achieve these skills.
Research in motor learning has suggested that basic movement patterns require approximately 3,000-5,000 repetitions to become automatic (8).
With consistent practice, you’ll accumulate these repetitions within the timeframe mentioned above.
Remember, this timeline covers only the basic skills. Advanced movements such as muscle-ups, handstand push-ups, and levers typically require 1-3 additional years of dedicated practice.
How to Progress in Calisthenics Skills
Follow the Repetition Range Method
Use the proven 8-12 repetition range for strength development (9). Start with 3 sets of 5 repetitions of your current progression and work your way up to 8. Once you can perform 3 sets of 12 repetitions with perfect form, advance to the next progression, but return to 3 sets of 5 repetitions.
This method ensures adequate stimulus for strength gains while preventing overreaching and maintaining movement quality.
Note that there’s not enough research to prescribe exact numbers to rep ranges. It can vary, but the idea is to progress over time.
Implement Proper Rest Periods
Allow 90-120 seconds between sets when pairing exercises (such as push-ups with squats). For single exercises, rest 45-60 seconds between sets to maintain strength output and movement quality (10).
Adequate rest is essential for calisthenics as these movements require high levels of neuromuscular coordination, which deteriorates with fatigue.
Prioritize Movement Quality
Every repetition should demonstrate complete control through the full range of motion. Focus on the eccentric (lowering) portion of each movement, taking 2-3 seconds to lower yourself in push-ups or pull-ups.
This controlled approach builds strength throughout the entire range of motion and develops the stability that is needed for advanced skills.
Use the Minimum Effective Dose
More isn’t always better in calisthenics. Aim for 15-25 total repetitions per movement pattern per session (across all sets). This volume provides sufficient stimulus for adaptation without overwhelming your recovery capacity (11).
Track Your Progress Systematically
Maintain a simple log noting the progression, sets, repetitions, and perceived difficulty for each session. This documentation will help identify when you’re ready to progress and prevent stagnation.
For detailed movement instructions and variations, check out our guide to beginner calisthenics moves.
The first step is to master the basic push-up. This fundamental movement teaches total-body tension, develops pressing strength, and establishes the movement patterns that are needed for more advanced skills. Start with incline push-ups if you can’t perform full push-ups with proper form. Calisthenics has four main levels: Beginner (basic movements such as push-ups and pull-ups), Intermediate (skills such as handstand push-ups and muscle-ups), Advanced (movements such as planche and front lever), and Elite (one-arm variations and dynamic skills). Each level may require 1-2 years of dedicated practice to master. Calisthenics challenges beginners as it requires controlling your entire body weight through complex movement patterns. Unlike machines that isolate muscles, calisthenics demands coordination, stability, and strength simultaneously. In addition, most people lack the baseline strength that is needed for fundamental movements such as pull-ups, which makes initial progress slow. The one-arm handstand is widely considered to be the most challenging calisthenics skill. It requires exceptional shoulder strength, perfect balance, and years of dedicated practice. Other contenders include the iron cross, one-arm pull-up, and full planche, each of which demands elite-level strength and coordination.Frequently Asked Questions
What is the first step of calisthenics?
What are the levels of calisthenics?
Why is calisthenics so difficult for beginners?
Which is the hardest skill in calisthenics?
The Bottom Line
These six foundational skills form the bedrock of all calisthenics training. Master them with patience and consistency, and you’ll build the strength, coordination, and body awareness that are needed for any advanced skill you choose to pursue.
Remember, every expert was once a beginner who refused to give up. Start with the push-up, focus on quality over quantity, and trust the process. Your calisthenics journey starts with a single repetition.
Start your practice today with perfect form, and within months, you’ll be amazed at what your body can achieve.
DISCLAIMER:
This article is intended for general informational purposes only and does not serve to address individual circumstances. It is not a substitute for professional advice or help and should not be relied on for making any kind of decision-making. Any action taken as a direct or indirect result of the information in this article is entirely at your own risk and is your sole responsibility.
BetterMe, its content staff, and its medical advisors accept no responsibility for inaccuracies, errors, misstatements, inconsistencies, or omissions and specifically disclaim any liability, loss or risk, personal, professional or otherwise, which may be incurred as a consequence, directly or indirectly, of the use and/or application of any content.
You should always seek the advice of your physician or other qualified health provider with any questions you may have regarding a medical condition or your specific situation. Never disregard professional medical advice or delay seeking it because of BetterMe content. If you suspect or think you may have a medical emergency, call your doctor.
SOURCES:
- Protocol for Minute Calisthenics: a randomized controlled study of a daily, habit-based, bodyweight resistance training program (2020, bmcpublichealth.biomedcentral.com)
- How fit are you? See how you measure up (2024, mayoclinic.org)
- Effects of strength training on neuromuscular adaptations in the development of maximal strength: a systematic review and meta-analysis (2025, nature.com)
- Effects of range of motion on muscle development during resistance training interventions: A systematic review (2020, pmc.ncbi.nlm.nih.gov)
- Effects of Resistance Training Overload Progression Protocols on Strength and Muscle Mass (2024, pubmed.ncbi.nlm.nih.gov)
- Effects of Resistance Training Frequency on Measures of Muscle Hypertrophy: A Systematic Review and Meta-Analysis (2016, link.springer.com)
- The Importance of Recovery in Resistance Training Microcycle Construction (2024, pmc.ncbi.nlm.nih.gov)
- Motor control and learning: A behavioral emphasis. (n.d., coachsci.sdsu.edu)
- Loading Recommendations for Muscle Strength, Hypertrophy, and Local Endurance: A Re-Examination of the Repetition Continuum (2021, mdpi.com)
- Acute Effect of Fixed vs. Self-Selected Rest Interval Between Sets on Physiological and Performance-Related Responses (2024, mdpi.com)
- A Systematic Review of The Effects of Different Resistance Training Volumes on Muscle Hypertrophy (2024, pmc.ncbi.nlm.nih.gov)