The sight of someone holding a perfect human flag or flowing seamlessly into a one-arm handstand stops people in their tracks. These moments represent years of dedicated training, progressive skill development, and an understanding of biomechanics that most casual observers never see.
Impressive calisthenics moves aren’t just about raw strength. They’re about creating a symphony between your nervous system, muscular coordination, and spatial awareness that transforms your body into a living demonstration of human potential.
The journey to these skills requires patience, precision, and most importantly, a structured approach to progression. In this article, we discuss 6 of the most visually striking calisthenics moves and provide a roadmap to achieve them safely and effectively.
What Makes Certain Calisthenics Moves So Visually Impressive?
Watch someone execute a flawless planche and you’re witnessing physics in action.
The human body, which is designed primarily for vertical movement, suddenly defies gravity in a horizontal plane. Your anterior deltoids work at maximum length, while your core creates a rigid plank that would make structural engineers envious.

The visual impact comes from 3 key factors:
- Leverage manipulation
- Isometric tension
- Spatial displacement
When you see a front lever, you’re observing someone who has learned to create massive amounts of force through disadvantaged joint angles. The muscles work exponentially harder as the center of mass moves further from the pivot point.
Your nervous system plays an equally important role. These moves demand incredible proprioceptive awareness, which is the ability to sense where your body exists in space without visual confirmation. This neurological component is what separates impressive moves from simple strength demonstrations (2).
The psychological impact cannot be understated. These moves represent mastery over fundamental human limitations. They communicate discipline, patience, and an understanding of progressive overload that extends far beyond typical gym training to allow for impressive calisthenics moves at home and anywhere possible.
BetterMe: Health Coaching app helps you achieve your body goals with ease and efficiency by helping to choose proper meal plans and effective workouts. Start using our app and you will see good results in a short time.
When someone holds a perfect human flag, they’re demonstrating months or years of consistent practice, injury prevention protocols, and systematic skill acquisition.
Most impressive moves also require significant mobility alongside strength.
A proper handstand demands 180 degrees of shoulder flexion combined with the strength to support your entire bodyweight through compromised leverage positions.
This combination of strength and mobility creates movements that appear almost superhuman to untrained observers.
Read more: Calisthenics Beginner Moves: The 4 Main Foundational Exercises Every Beginner Must Master
What Are Some Impressive Calisthenics Moves for Beginners?
Many people want to know, “What are show-stopping impressive calisthenics moves for beginners?” and “What Are the Easiest Impressive Calisthenics Moves for Beginners?”
However, the awe-inspiring calisthenics moves are not beginner-friendly. The skills that generate genuine amazement typically require 6 months to several years of dedicated training. Anyone who promises quick mastery is either misleading you or discussing movements that aren’t genuinely impressive.
As a beginner, your best bet is to master prerequisite movements before you attempt advanced variations.
Each impressive move has a logical sequence of progressions that build the necessary strength, mobility, and neuromuscular coordination. Skipping steps can lead to plateaus, injuries, and frustration.
Make sure you go through these progressions gradually over time, do an adequate warm-up/cool-down, and take regular rest days every week to avoid injuries.
1. Handstand
The handstand represents the foundation of upper-body calisthenics mastery. This move demands perfect alignment, shoulder stability, and core integration while inverted against gravity.
- Begin with wall-supported holds, focusing on creating a straight line from your wrists to your ankles. Your hands should be shoulder-width apart with fingers spread for optimal weight distribution.
- Practice chest-to-wall handstands to develop proper shoulder positioning and eliminate the common banana-back compensation.
- Progress to assisted freestanding attempts with a spotter, then work toward brief unsupported holds. The intermediate stage involves consistent 30-60 second freestanding handstands with controlled entry and exit.
Advanced handstand execution:
- Begin in a pike position with your hands planted shoulder-width apart.
- Engage your core and slowly shift weight forward onto your hands.
- Lift one leg, then the other, finding your balance point through subtle finger pressure adjustments.
- Maintain a rigid body line with active shoulder elevation.
- Hold for your target duration while breathing rhythmically.
- Lower with control, avoiding collapse or sudden drops.
2. Muscle-Up
The muscle-up bridges the gap between pulling and pushing movements, requiring explosive power and seamless transition mechanics. This move demonstrates upper-body coordination and strength through multiple movement planes.
- Start with strict pull-ups and parallel bar dips as foundational movements.
- You’ll need approximately to be able to perform 15 strict pull-ups and 20 parallel bar dips before attempting muscle-up progressions.
- Practice transition work using resistance bands or jumping muscle-ups to develop the movement pattern.
- The intermediate progression involves negative muscle-ups, starting from the support position and slowly lowering through the transition. Band-assisted muscle-ups help you practice the complete movement with reduced bodyweight.
Advanced muscle-up execution:
- Hang from the bar with a slightly wider than shoulder-width grip.
- Initiate with an aggressive pull, bringing your chest toward the bar.
- As you reach chest height, quickly transition your grip from under to over the bar.
- Press through the transition, shifting your shoulders forward over the bar.
- Complete the movement by pressing into the full support position.
- Lower with control, reversing the movement pattern.
3. Planche
The planche transforms your body into a human lever, requiring tremendous strength in the anterior deltoids and core stability. This move defies physics as you maintain horizontal body alignment supported only by your hands.
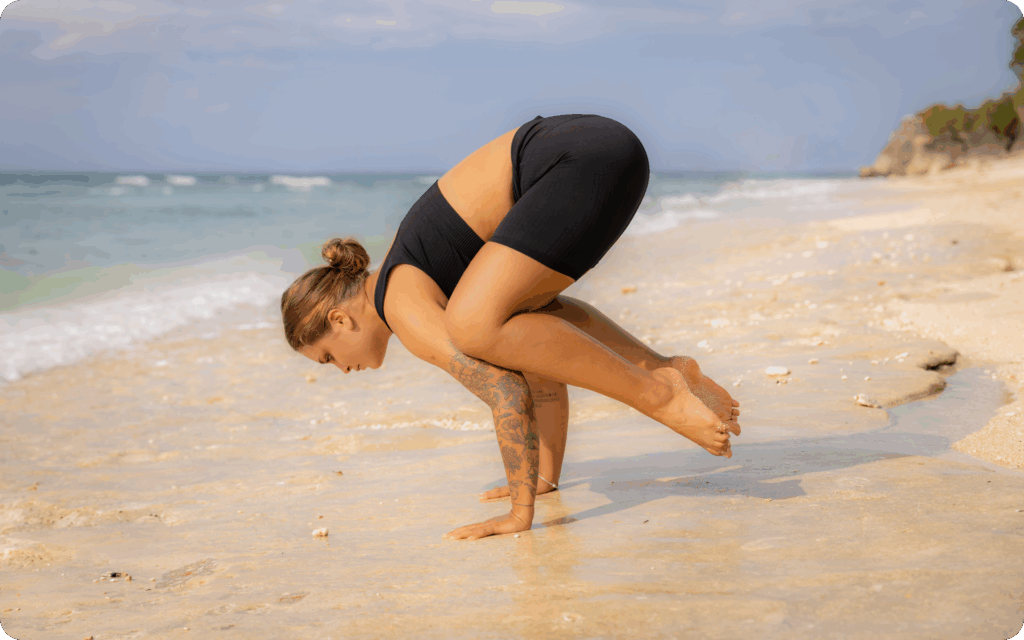
- Foundation work includes frog stands, crow pose, and pseudo planche push-ups.
- Build up to 60-second frog stands before progressing to the next level.
- Tuck planche represents the first actual planche progression, where you lift your feet off the ground while maintaining the tucked position.
Intermediate progressions move through advanced tuck, straddle, and one-leg variations. Each stage requires dedicated isometric holds and dynamic strengthening exercises.
Advanced planche execution:
- Begin in a planche lean position with your hands placed slightly ahead of your shoulders.
- Gradually shift more weight onto your hands while lifting your feet.
- Extend your legs behind you, creating a straight line from head to toe.
- Keep your shoulders rolled forward (protraction) and in front of your wrists.
- Keep your core maximally engaged to prevent sagging.
- Hold the position while maintaining steady breathing.
4. Human Flag
The human flag represents lateral core strength and grip endurance in its most dramatic form. Your body becomes perpendicular to the vertical pole, creating a striking visual that appears to defy gravity.
- Begin with side planks and hollow body holds to develop lateral core strength.
- Practice flag progressions on a pull-up bar or a sturdy vertical pole. Start with tucked flags, then progress to advanced tuck and single-leg variations.
- The intermediate stage involves brief holds of the straddle flag, building up endurance and strength in the bottom arm and lateral core muscles.
Advanced human flag execution:
- Grip the vertical pole with your top hand in an overhand grip and your bottom hand in an underhand grip.
- Position your hands approximately shoulder-width apart.
- Engage your core and press your bottom arm while pulling with your top arm.
- Slowly lift your legs until your body is parallel to the ground.
- Maintain rigid body alignment with active core engagement.
- Hold while distributing the force between both arms.
Read more: How to Master the Human Flag in Calisthenics: Complete Guide
5. Front Lever
The front lever showcases posterior and anterior chain strength, in addition to body control, by holding your body parallel to the ground while hanging from a bar.
This move demands exceptional lat strength and core stability.
- Start with inverted rows and hollow body holds to build the necessary posterior chain strength.
- Progress through tucked front lever holds, building up to 20-30 second holds before advancing.
- Advanced tuck and straddle progressions bridge the gap to the whole movement.
- Intermediate training includes front lever rows and negative repetitions to build strength through the full range of motion.
Advanced front lever execution:
- Hang from a pull-up bar with a shoulder-width overhand grip.
- Engage your core and begin pulling your body up while keeping your arms straight.
- Slowly lower your legs until your body forms a straight line that is parallel to the ground.
- Maintain active lat engagement and core tension.
- Keep your shoulders pressed down and back.
- Maintain the position while keeping a steady breathing pattern.
Whether you’re a workout beast or just a beginner making your first foray into the world of fitness and dieting – BetterMe has a lot to offer to both newbies and experts! Install the app and experience the versatility first-hand!
6. One-Arm Handstand
The one-arm handstand represents the pinnacle of handstand progression, requiring asymmetrical strength, advanced proprioception, and years of dedicated practice.
This move combines strength, balance, and body awareness in the most demanding way possible.
- Master the two-arm handstand completely before you attempt one-arm progressions. You’ll need to be able to perform consistent 2-minute freestanding handstands and advanced strength exercises, such as handstand push-ups.
- Begin with wall-supported one-arm attempts and chest-to-wall practice.
- Intermediate progressions include brief freestanding attempts with immediate return to two arms, gradually increasing hold duration.
Advanced one-arm handstand execution:
- Begin in a solid two-arm handstand.
- Slowly shift your weight onto your supporting arm while maintaining balance.
- Gradually lift your free arm, making micro-adjustments through your supporting hand.
- Keep your body aligned over your supporting hand.
- Maintain active shoulder engagement and core tension.
- Hold for your target duration while breathing steadily.
Are you looking to explore different calisthenics poses for beginners to add variety to your training? Understanding the full spectrum of movements will enable you to create more balanced training programs.
How Long Does It Take to Learn Impressive Calisthenics Moves?
Time frames for learning impressive calisthenics moves vary dramatically, based on your starting point, consistency, and training approach. However, we can estimate how long it would take based on consistent, intelligent training protocols.
- Handstands typically require 3-6 months for beginners to achieve 30-second freestanding holds. Those with previous experience in gymnastics or yoga may progress more quickly, while individuals with shoulder mobility limitations may require a longer period. The key variable is consistent practice combined with proper progression.
- Muscle-ups typically take 6-12 months for most people, assuming they have adequate foundational strength. If you’re starting from zero pull-ups, add another 6-12 months of basic strength development. The transition mechanics require significant practice even after achieving the necessary strength.
- Planche progressions extend over much longer timeframes. A full planche typically requires 2-4 years of dedicated training for most individuals.
The anterior deltoid strength demands are enormous, and this muscle group responds slowly to training stimuli. Tuck planches may be achievable in 6-12 months with consistent practice.

- Human flags usually take 12-24 months, depending on your starting lateral core strength and grip endurance. Individuals who are heavier face additional challenges due to the leverage demands of the movement.
- Front levers require similar timeframes to planches, typically 1-3 years to master the entire movement. The posterior chain strength requirements are substantial, although generally more achievable than those of the planche demands.
- One-arm handstands represent the longest journey, often requiring 3 to 7 years of dedicated practice. This timeline assumes you already have solid two-arm handstands and includes the significant wrist conditioning necessary for single-arm support.
Remember that these timelines represent conservative estimates.
Several factors influence these timelines significantly.
Your training frequency can have a direct impact. As many people say, practice makes perfect. The more time you dedicate to learning a skill, the sooner you might master it.
Starting strength levels dramatically affect progression speed. Someone who starts with 15 pull-ups will achieve a muscle-up much faster than someone who is struggling with their first pull-up. Assess your baseline honestly and adjust expectations accordingly.
Age plays a role, particularly for skills that require extensive wrist conditioning. Younger trainees generally adapt more quickly, although dedicated older athletes can achieve impressive skills with proper progression and patience.
Body composition influences certain moves more than others. Heavier individuals face additional challenges with moves such as human flags and planches due to leverage disadvantages. However, proper progression can help you overcome these obstacles.
Previous movement experience accelerates learning significantly. Dancers, martial artists, and gymnasts possess proprioceptive advantages that translate directly to calisthenics skills. However, dedicated beginners can consistently surprise with their progression rates.
Do you need more challenges in your routine? Explore these hard bodyweight exercises to push your training to the next level.
What’s The Safest Way to Train for Impressive Moves?
Safety in calisthenics training requires an understanding of injury mechanisms and the implementation of prevention strategies from the outset.
The most impressive moves place tremendous stress on joints and connective tissues, which makes injury prevention absolutely essential for long-term success.
- Progressive Overload Principles
Progressive overload in calisthenics differs significantly from weight training.
Instead of adding external load, you manipulate leverage, hold times, and movement complexity. This progression method may reduce injury risk while building necessary strength adaptations (2).
Never skip progression steps, regardless of your perceived strength level.
Each progression builds specific strength patterns and connective tissue adaptations that are required for the next level. Attempting advanced moves without proper preparation leads to acute injuries and chronic overuse problems (3).
Volume progression should increase gradually, typically no more than 10-20% per week (4). This volume progression applies to hold times, repetitions, and training frequency.
Your connective tissues adapt more slowly than muscle tissue, which makes patience essential for long-term development.
- Joint Preparation and Conditioning
Wrist conditioning represents the most important safety consideration for hand-balancing moves (5). Handstands, planches, and one-arm handstands place enormous stress on wrist joints not designed for weight-bearing activities. Start conditioning at least a month before you attempt advanced progressions.
Ignore wrist preparation at your own risk – wrist injuries can sideline you from training for months.
- Implement daily wrist circles, flexor and extensor stretches, and progressive weight-bearing exercises to maintain flexibility and strength.
- Rice bucket exercises and resistance band work strengthen the small muscles that support wrist stability.
Shoulder preparation involves mobility and stability work in equal measure.
- German hangs and shoulder dislocates improve the mobility that is required for overhead positions.
- Band external rotations and scapular stabilization exercises prepare the shoulder girdle for advanced loading patterns.
Elbow health depends primarily on proper progression and technique.
Avoid forced range of motion and ensure adequate recovery between training sessions.
Tennis elbow and golfer’s elbow often develop when trainees rush through progressions or overlook fundamental technique.
- Recovery and Regeneration
Skill training requires different recovery considerations than strength training.
Your nervous system needs time to consolidate movement patterns, which makes rest days essential for progression (6). Train skills when you’re fresh, typically at the beginning of training sessions.
Sleep quality has a significant impact on skill acquisition and the risk of injury. During sleep, your brain consolidates movement patterns and repairs connective tissues. Aim for 7-9 hours of quality sleep, particularly during intensive training phases (7).
Nutrition plays a crucial role in supporting recovery and adaptation, although specific nutritional requirements vary from individual to individual. Adequate protein supports tissue repair while sufficient carbohydrates fuel high-intensity training sessions. Hydration affects joint lubrication and thermoregulation during training (8).
- Listening To Biofeedback
Your body provides constant feedback about readiness and fatigue levels. Learn to interpret these signals before they become injury warnings (9). Joint stiffness, unusual soreness, and decreased performance indicate the need for additional recovery time.
Morning heart rate variability, subjective energy levels, and sleep quality provide valuable biofeedback data. Technology such as heart rate monitors can quantify these metrics, though subjective awareness often proves equally valuable.
Acute pain always requires immediate attention and possible modification of training. Distinguish between normal training discomfort and potentially injurious pain. If you’re in doubt, consult a qualified healthcare provider who is familiar with the demands of calisthenics training.

- Programming Considerations
Periodization applies to calisthenics training just as it does to other athletic pursuits. Plan training blocks that focus on specific adaptations while allowing for adequate recovery periods. Avoid training multiple intensive skills simultaneously.
Deload weeks every 4-6 weeks prevent overuse injuries and allow supercompensation.
Reduce training volume by 40-60% while maintaining movement quality and frequency.
Use deload periods for mobility work and technique refinement.
Cross-training activities support calisthenics development while providing movement variety. Swimming, yoga, and climbing offer complementary benefits while reducing repetitive stress. However, ensure additional activities don’t interfere with skill practice and recovery.
Are you looking for foundational movements to build your skills? Check out these beginner calisthenics moves to establish proper movement patterns.
How Often Should You Train for Flashy Calisthenics Skills?
Training frequency for advanced calisthenics skills requires balancing consistent practice with adequate recovery. Steven Low, author of Overcoming Gravity and a respected authority in bodyweight training, recommends skill-focused training 3-4 times per week for optimal development.
Skill-based movements benefit from higher-frequency, lower-volume sessions.
Your nervous system learns movement patterns through repetition, which makes regular practice superior to infrequent high-volume sessions. However, this only applies when you can maintain quality technique throughout the session.
For handstand training, daily 15-20 minute sessions, 3-4 times a week are ideal.
Your nervous system consolidates balance patterns during rest periods, which makes consistent exposure more valuable than extended practice sessions.
Strength-focused progressions require different frequency considerations. Planche and front lever training demand significant recovery time due to the intense eccentric loading and connective tissue stress. Training these movements 3-4 times per week allows adequate recovery while maintaining progression stimulus.
The intensity of your training session determines optimal frequency. Light skill practice can occur daily, while maximum effort isometric holds require 48-72 hours of recovery. Structure your weekly schedule to alternate between skill days and strength days.
Steven Low’s research suggests that beginners will benefit from full-body training 3 times per week, focusing on fundamental movement patterns. As your skills advance, you can increase frequency for specific movements while maintaining overall training balance.
Advanced practitioners often train twice daily: morning skill sessions and evening strength work. This approach separates neurologically demanding activities from physically demanding training, optimizing both adaptation pathways.
Listen to your body’s feedback signals when determining the frequency.
Decreased performance, joint stiffness, or motivation loss indicate the need for additional recovery time. Reduce the frequency temporarily rather than pushing through fatigue states.
Competition preparation may require higher frequencies for specific skills, but this represents a short-term peak rather than sustainable long-term practice.
Always return to moderate frequencies after competitive periods to prevent overuse injuries.
The muscle-up represents the most impressive skill that is accessible to beginners with solid foundational strength. While it requires several months of dedicated training, the visual impact and sense of accomplishment make it an excellent first impressive skill to pursue. Unlike isometric holds that demand exceptional patience, the muscle-up provides clear progression milestones and immediate feedback on improvement. Height presents additional challenges, but doesn’t prevent mastering impressive calisthenics moves. Taller individuals face greater leverage disadvantages and typically require more strength to achieve the same positions. However, many accomplished calisthenics athletes are tall. Success requires patience, consistent training, and often longer development timelines compared to shorter practitioners. Training impressive calisthenics skills 3-4 times per week optimizes development while allowing adequate recovery. Focus on 15-30 minutes of skill-specific practice per session, supplemented by strength and mobility work. Daily training often leads to diminishing returns and increased injury risk, while less frequent training slows skill acquisition. Steven Low’s Overcoming Gravity provides the most comprehensive progression system for advanced calisthenics skills. Online communities such as Reddit’s bodyweight fitness forum offer peer support and technique feedback. Professional calisthenics coaches can provide personalized guidance and form corrections that accelerate safe development.Frequently Asked Questions
What’s the most impressive beginner-friendly move?
Can tall people do impressive calisthenics?
How often should you train for flashy skills?
Where can you learn progressions for impressive moves?
The Bottom Line
Impressive calisthenics moves represent the intersection of strength, skill, and dedicated practice. These gravity-defying demonstrations of human potential require systematic progression, intelligent programming, and unwavering patience.
The journey toward mastering these skills will transform your physical capabilities and your understanding of what your body can achieve. Each progression step builds strength, control, and confidence that extends beyond the training environment.
Start with an honest assessment of your current abilities. Choose one skill that aligns with your strength level and interests and work on it consistently. Commit to consistent practice over months and years rather than seeking quick fixes or shortcuts.
Remember that the most impressive aspect of these movements isn’t the final skill itself, it’s the dedication and systematic approach that are required to achieve them.
DISCLAIMER:
This article is intended for general informational purposes only and does not serve to address individual circumstances. It is not a substitute for professional advice or help and should not be relied on for making any kind of decision-making. Any action taken as a direct or indirect result of the information in this article is entirely at your own risk and is your sole responsibility.
BetterMe, its content staff, and its medical advisors accept no responsibility for inaccuracies, errors, misstatements, inconsistencies, or omissions and specifically disclaim any liability, loss or risk, personal, professional or otherwise, which may be incurred as a consequence, directly or indirectly, of the use and/or application of any content.
You should always seek the advice of your physician or other qualified health provider with any questions you may have regarding a medical condition or your specific situation. Never disregard professional medical advice or delay seeking it because of BetterMe content. If you suspect or think you may have a medical emergency, call your doctor.
SOURCES:
- Proprioception: clinical relevance and neurophysiology (2021, sciencedirect.com)
- Preventing Sports Injuries (n.d., hopkinsmedicine.org)
- The 10% Rule: Does it hold True? (2019, pogophysio.com.au)
- Wrist Instability (2023, ncbi.nlm.nih.gov)
- EXPLORING THE SCIENCE OF RECOVERY (n.d., nasm.org)
- How does sleep help recovery from exercise-induced muscle injuries? (2021, pubmed.ncbi.nlm.nih.gov)
- Nutrition and Muscle Recovery (2021, mdpi.com)
- Training Load and Fatigue Marker Associations with Injury and Illness: A Systematic Review of Longitudinal Studies (2016, ink.springer.com)